
Now that we have a successfully built project, let’s look at the process of scripting in Armory. Scripting works by attaching scripts to in world objects. There are two mechanism, Node based scripting or Haxe based. Let’s look at both processes. Let’s start with a Haxe script example.
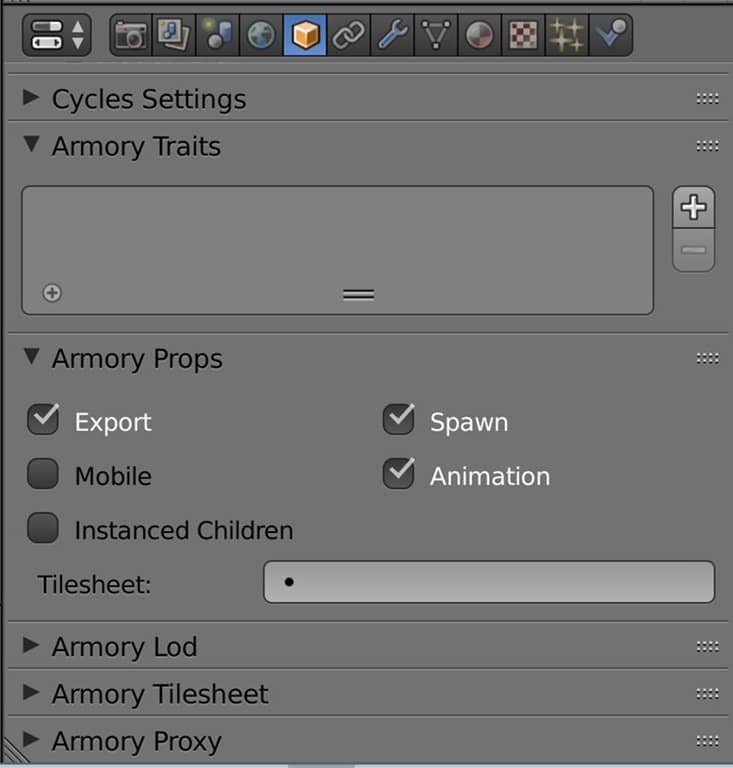
Assuming you have the default scene still, select the default cube (if not, create a new one using Add->Mesh->Cube) in Blender. With an object such as the default cube selected, locate the Property tab and there are several categories specific to Armory, Armory Traits, Armory Props, Armory Lod, Armory Tilesheet and Armory Proxy. This is where we directly apply Armory properties to objects.
Now we want to create a new Trait, click the + icon to create a new Trait. The step by step details are shown in the video below.
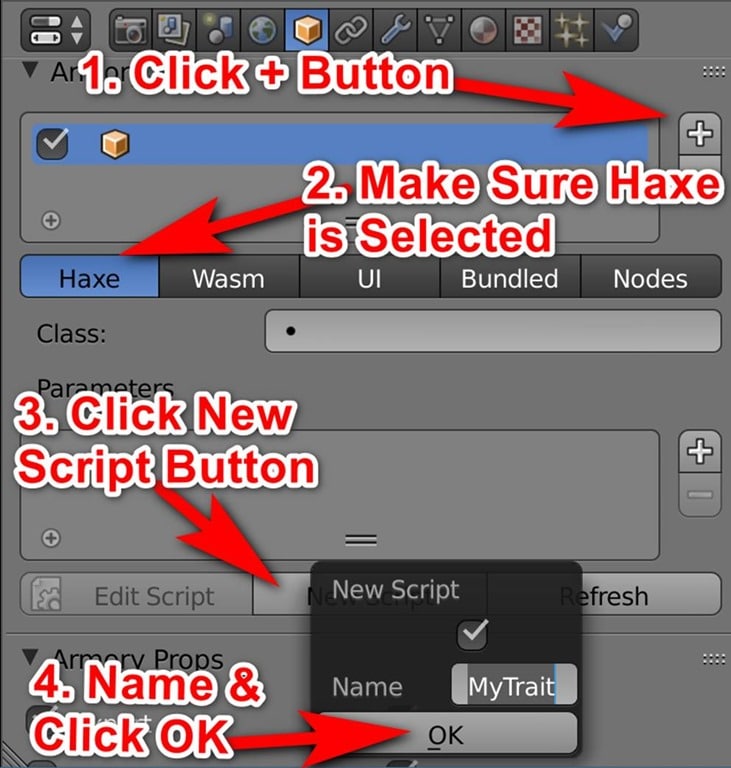
This will create a script called MyTrait.hx in your project directory. Armory has a built in code editor, Kode Studio, which is based on Visual Studio Code. Click the Edit Script button and the selected trait will be opened in the editor.

Enter the following code in the editor:
package arm;

class MyTrait extends iron.Trait {
  public function new() {
    super();

    trace("Hello from Haxe!");
  }
}
We are simply writing the debug string “Hello from Haxe!” when our game is launched. In Kode Studio, press F5 or select Debug->Start Debugging to compile and run your code. Your game should now run in a new window. If you look at the lower part of the screen in Kode Studio, select DEBUG CONSOLE and you should see:

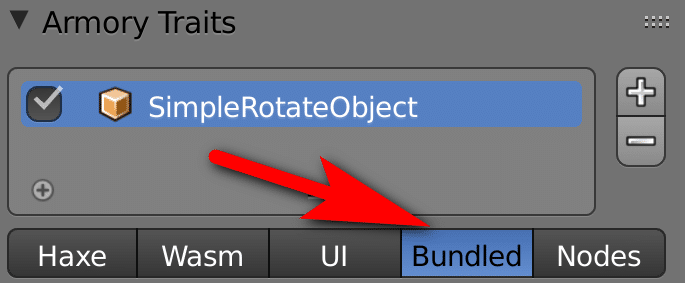
There are several traits built in to Armory that you can use to get started as you are getting more comfortable with programming in Haxe. You can add existing traits by selected Bundled in the traits
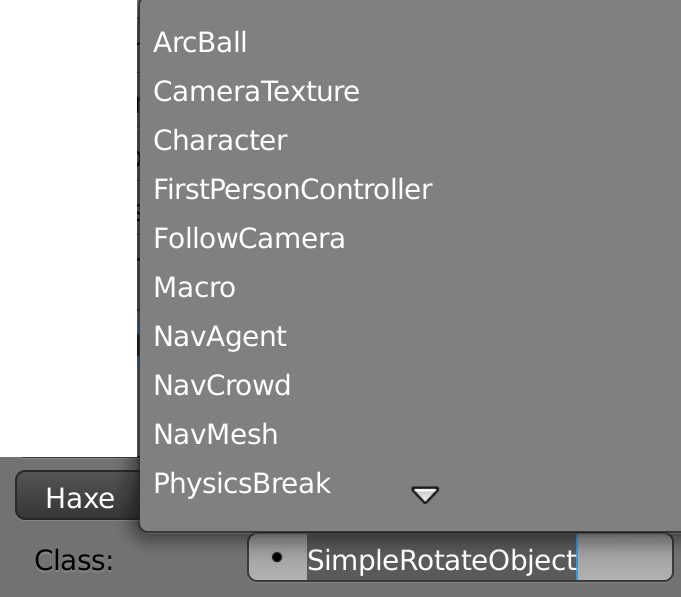
Right below select the Class selection and choose the bundled trait you want to use.
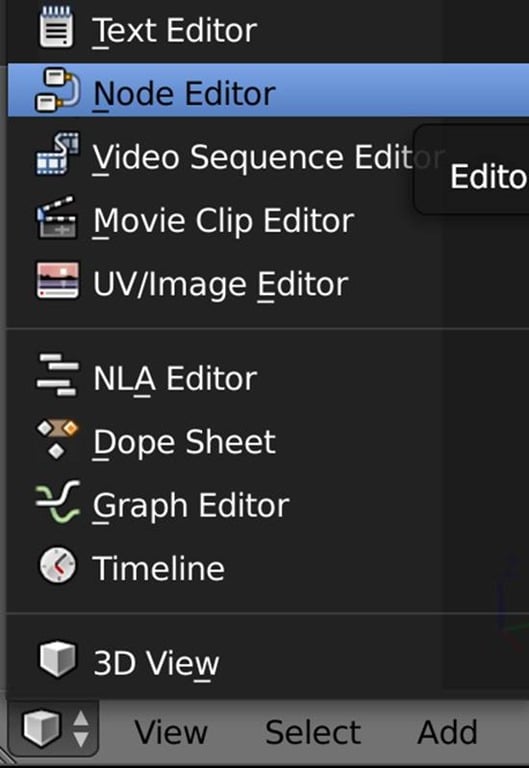
Now let’s look at the process of scripting via Nodes in Blender. Open up or switch a window to the Node Editor:
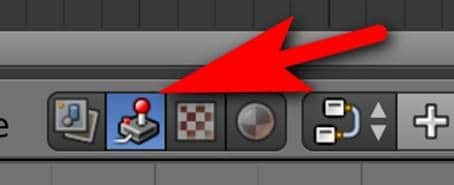
Now switch to Logic Mode in the bottom toolbar:
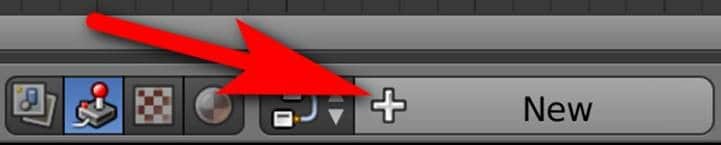
Now it’s time to get started. First we need to create a new node graph, simply click the New button:
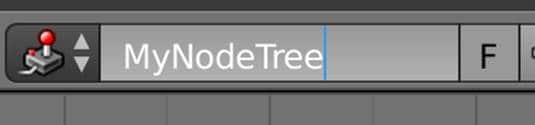
Once you’ve clicked New, you can then click in the same space and rename your newly create graph:
Programming via nodes is pretty straight forward, you simply connect lines between various different nodes to make your program flow. First we need an event to start things off. Select Add->Event->On Init.
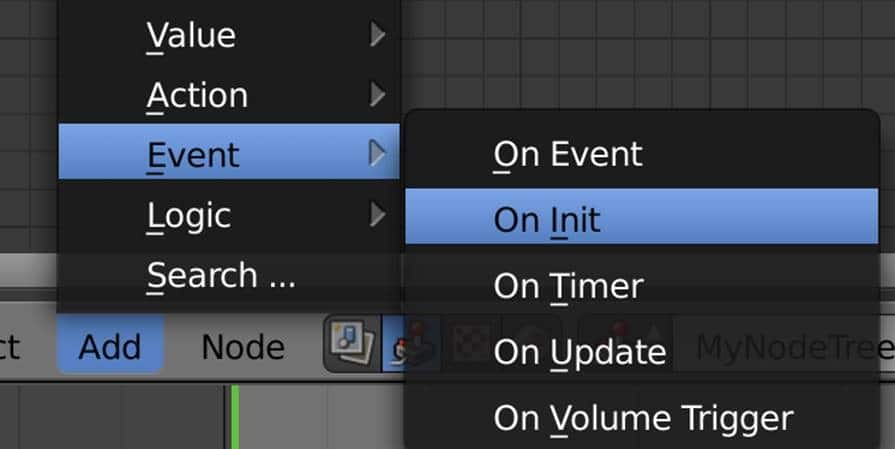
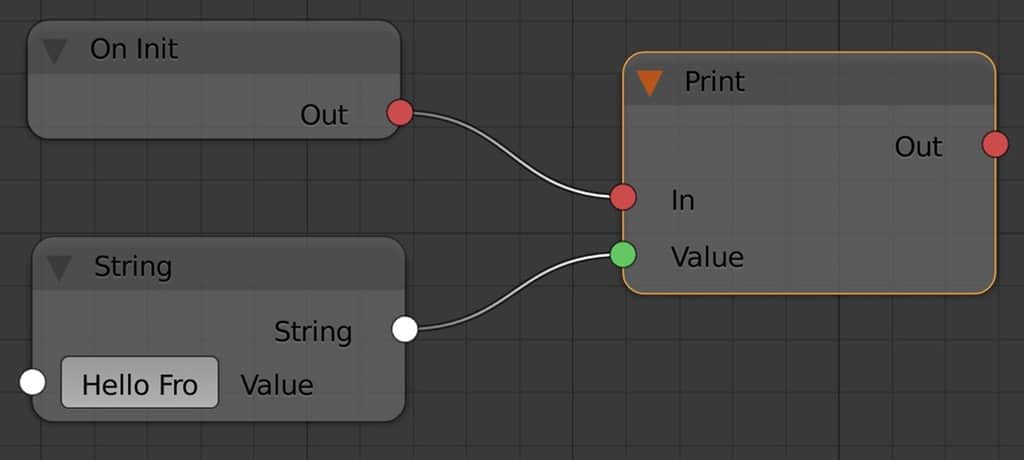
OnInit is an event that is called when your object is being created, this will be called only once and is called before the node is displayed. Generally, you will use OnInit to do initial setup for the attached object. Now add two more nodes, a Variable->String and Action->Print. Now connect the red pin from the Out on the OnInit node to the In on the Print node. Next connect the String out from the String node to the Value in on the Print node. In the String node in the value field, double click and enter “Hello From Nodes”.
Final result:
Unfortunately in Armory 0.4, the Print Node is currently not working properly in Windows!
When developing, the ability to dump information out to screen is invaluable, especially as you are learning. Due to the fact trace() seems to be currently broken on Windows but working on other platforms, we need a work around. Thankfully there is just such an option, the Canvas, which we will illustrate now. The Canvas is a 2D UI layer, handy for things like high scores and the like, but in this case also great for debug information. We need to jump through a few hoops though.
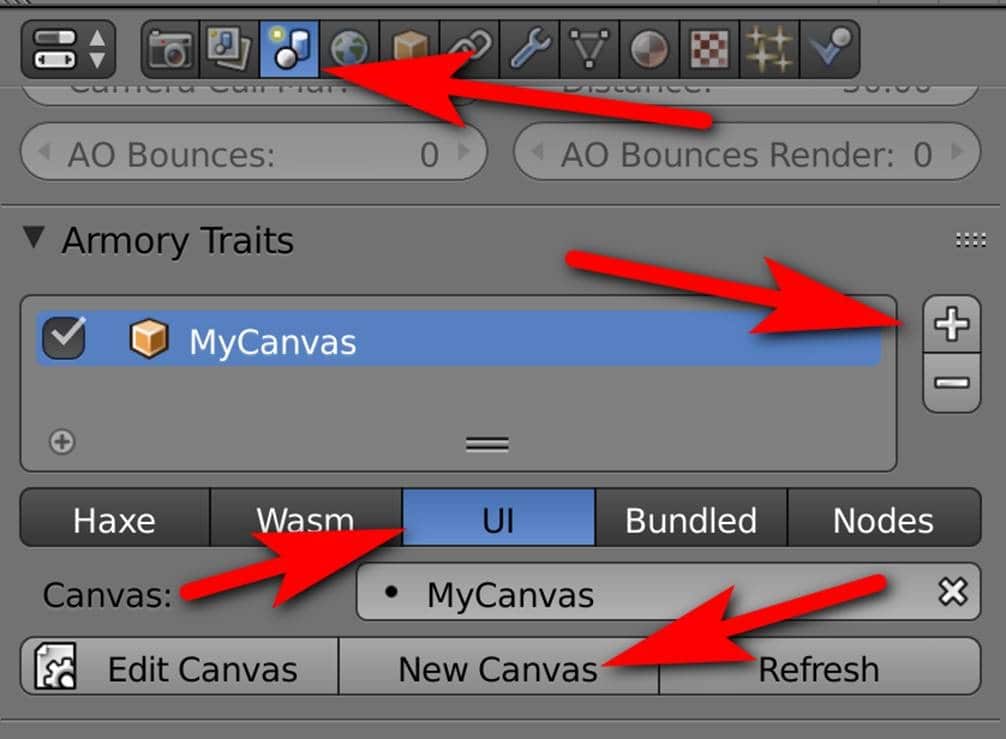
First, we need to create a Canvas. Switch to the Scene tab, locate Armory traits and click the + Icon, then switch to UI and click New Canvas.
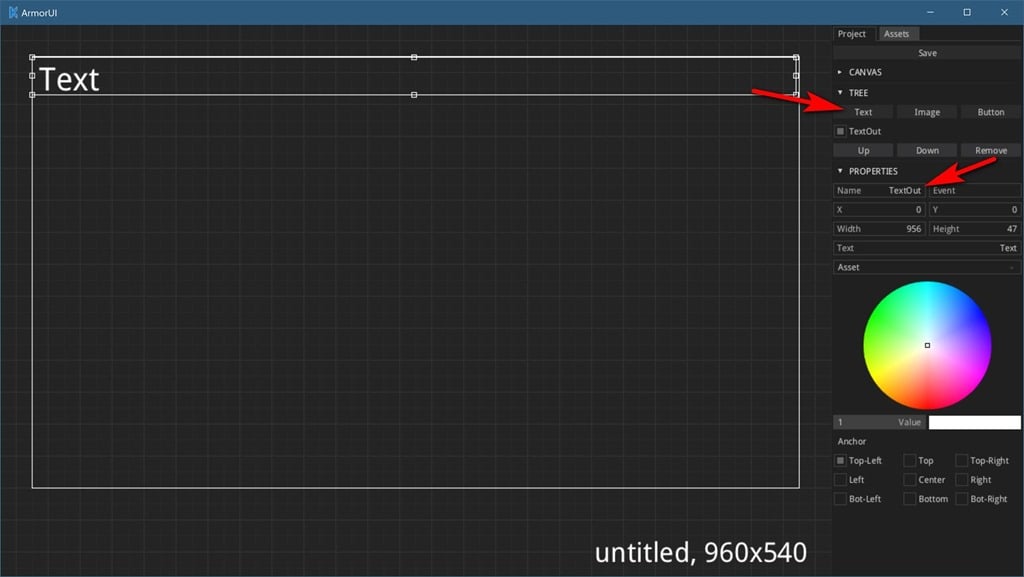
Now click Edit Canvas, this will bring up a UI editing window. Now click Text to create a new text field, change it’s name to TextOut and resize the text box to the full width of your window. Click Save to the top right when done editing.
We can now print to this canvas using the following simple Node tree:

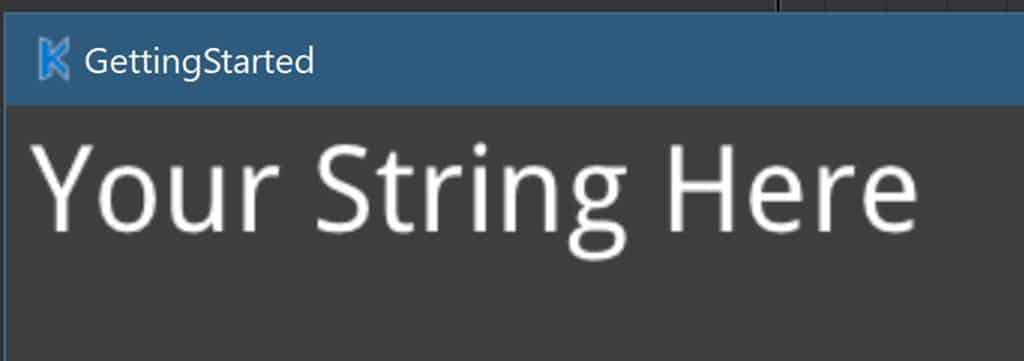
Now when you run your game:
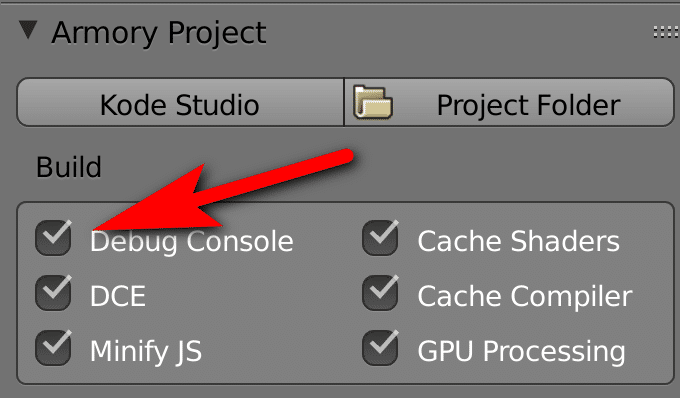
There is actually one more option when it comes to printing debug information to your scene, using the debug console. The debug console can be enabled in the Render settings, under Armory project then check Debug Console:
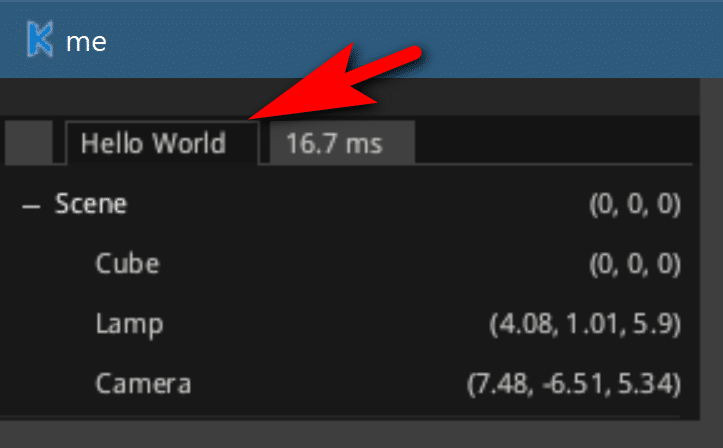
Now when you run your game, anything your print will be displayed in the debug console which is overlain over your running application.
These Armory tutorials are a big help in speeding up the learning process. I may not be the most popular authoring tool, but having the Blender graphics capabilities, mixed with the gaming capabilities via Haxe and nodes via Armory on multiple platforms is exciting.
Thanks Anthony. So glad you find the Armory tutorials helpful!