Introduction
Cocos Creator has pretty powerful animation tools built-in. In this tutorial, we are going to look at those capabilities, showing how to create animations.
Creating an Animation
Let’s jump right in a create our first animation. I have multiple individual frames of animation like so:
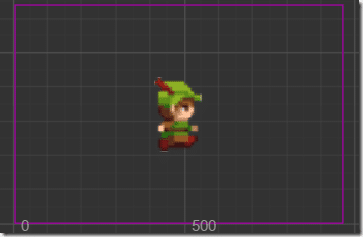
Drop the sprites into your game’s assets. Next, create a Sprite node and set it’s graphic to the first frame of our walking animation.
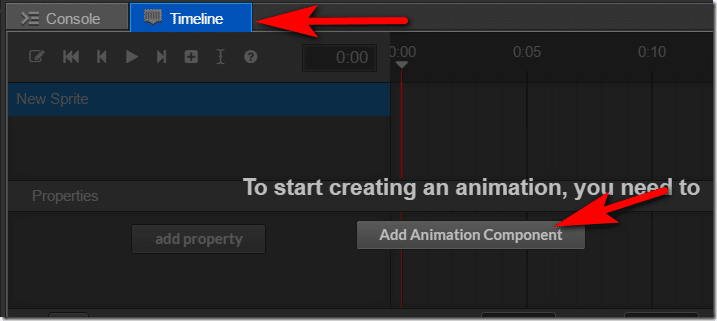
Now it’s time to create an animation. With the sprite still selected, switch to the Timeline panel and click the Add Animation Component button… which predictably enough, adds an Animation Controller to your selected node.
Now click Add New AnimClip:
A popup will be displayed asking you to name your new animation. I called mine walk.anim and saved it in a folder called animations. Finally, click the Edit button to begin editing our new animation:
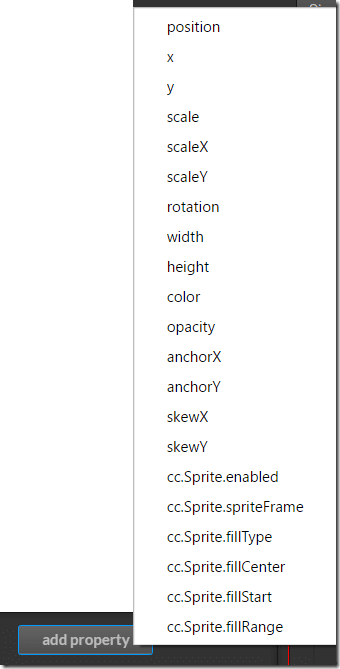
We are now going to add a property to animate, click the Add Property button. Cocos will analyze the node you’ve got selected and show you an applicable list of properties that can be animated:
In this case, we are interested in changing the spriteFrame as we advance the timeline. Select cc.Sprite.spriteFrame.
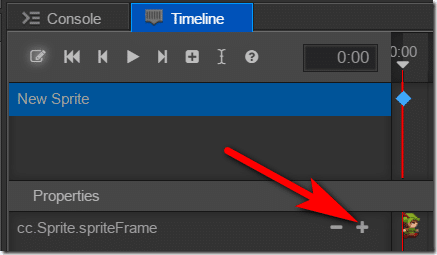
Now click the + icon and you will see an initial keyframe was added in the timeline at the 0-second mark:
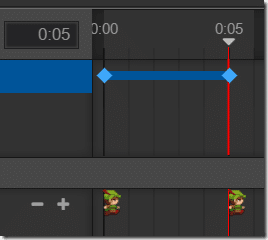
Left-click in the timeline to advance to the 0:05 mark, then click the + again to create another keyframe:
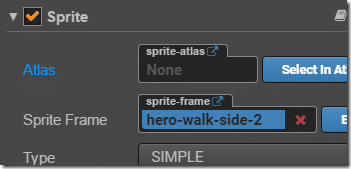
Now drag the second frame of animation to the sprite frame property of our sprite.
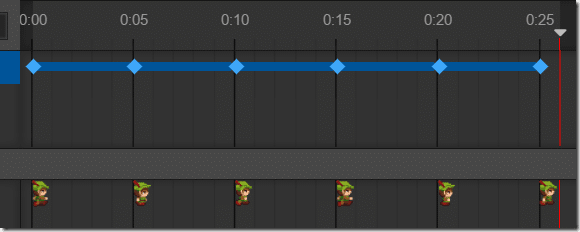
Now repeat for all 6 frames of animation, then the result should look like this:
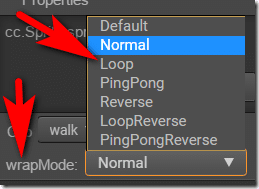
Be careful when dragging individual frames to the sprite frame property not to hover over the timeline as it has the nasty habit of changing the selected keyframe! Now that our walk animation is defined, can set it to loop infinitely when done playing. Select Wrap Mode and choose Loop:
You can now preview your animation using the VCR style controls:
The animation is probably way faster than you’d like. In this case, simply modify the speed value, try 0.3:
This value can easily be changed on the fly in code. While we are here, let’s show how you can call some code during an animation. Now select about the midway point then click the insert event icon:
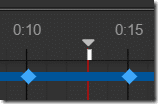
This will add a little white marker to the timeline:
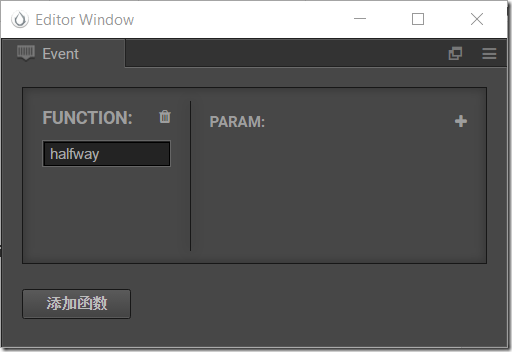
Double left-click this and it will bring up the following (not fully translated dialog):
Put the name of the function you want to call. If you have parameters to pass in, they can also be added here. The non-translated button simply adds another function call. I put halfway in the function text box. Now attach a new script and implement the halfway() function like so:
const {ccclass, property} = cc._decorator;

@ccclass
export default class NewClass extends cc.Component {
    halfway(){
        console.log("Halfway through animation");
    }
    start () {

    }
}
This function will then be called when that marker is reached. This is useful for synchronizing to an animation, such as playing a sound effect halfway through a shooting animation.
Now, and this part is tricky and catches me up all the time… be sure to save your animation! Click the Edit button again to signal that you are done working on the animation. This will prompt you to save… do so.
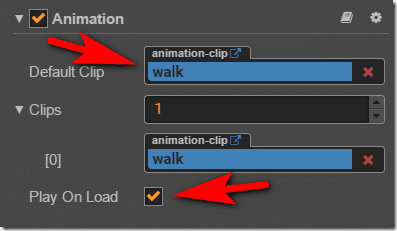
Now drag your newly saved walk animation over to the Default Clip section of the Animation component. Also click Play on Load while you are here, so the animation starts automatically once it’s created.
If you prefer to start the animation manually using code, you can do so with the following simple code:
    start () {
        this.getComponent(cc.Animation).play("walk");
    }
One thing to be aware of that we didn’t cover in this tutorial, you can animate basically any element of a node using the timeline. We only just scratched the surface of what it’s capable of. You can easily animate attributes like position, scale, rotation, color, and much more.
Using code you can easily check the status of an animation. This following code simply waits for the user to press the P key. If the animation is currently playing, we pause it, otherwise, start it playing.
If the animation is currently playing, we pause it, otherwise start it playing.
    start () {
        this.getComponent(cc.Animation).play();
        cc.systemEvent.on(cc.SystemEvent.EventType.KEY_UP,(e)=>{
            if(e.keyCode == cc.KEY.p){
                if(this.getComponent(cc.Animation).getAnimationState("walk").isPaused){
                    this.getComponent(cc.Animation).getAnimationState("walk").play();
                }
                else{
                    this.getComponent(cc.Animation).getAnimationState("walk").pause();
                }
            }
        },this);
    }






I would like a tutorial on how to use actions. I have the basics down but it still can be a nuisance because sometimes the view port doesn’t show the correct actions. I feel like I just don’t have the basic conception of how actions in the NLA are supposed to work. A video would be helpful.
This series is well beyond amazing and probably the most comprehensive documentation on the engine as of yet!! Kudos!!Could you please indicate how can we reproduce the same markers behavior displayed with the nodes in Haxe code? Thank you in advance!