Introduction
Now let’s look at how we script our Cocos Creator game. Over the course of this series, we will, of course, get into a lot more depth on how to script particular tasks in detail, this section is more about the process of working with scripts in general.
Setting Up Your Environment
First, let’s start things off by configuring a development environment. The ideal code editor when working with Cocos Creator is Visual Studio Code, which is an all-around great open-source code editor in its own right. Cocos Creator is specially designed to work with VSC, although you can use whatever editor you wish, this is the one I will be using for these tutorials. Please note that Visual Studio Code is different than Visual Studio… yeah, a confusing naming convention by Microsoft there.
If you haven’t already, download and install Visual Studio Code. Once it’s installed, make sure to run Visual Studio Code at least once, accept any updates or security prompts it asks of you, then close Visual Studio Code.
Now back in Cocos Creator, select Developer->VS Code Workflow->Install VS Code Extension:
You are now good to go.
Creating a Script
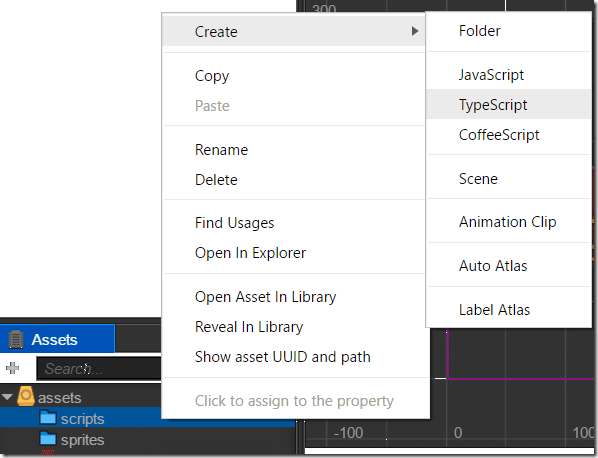
A script in Cocos Creator is simply another type of asset. In our Asset panel, create a new folder called scripts, then right-click this folder and select Create-> then we have a choice of 3 different scripting languages, JavaScript, TypeScript and CoffeeScript. CoffeeScript is a special language that can be compiled into JavaScript, TypeScript is similar except it’s also a superset of JavaScript (in other words, all JavaScript is TypeScript) or of course you can use plain jane JavaScript. I personally prefer TypeScript, since it has the best code competition support… and frankly, because it’s a nicer language to work with than JavaScript. The choice ultimately is yours.
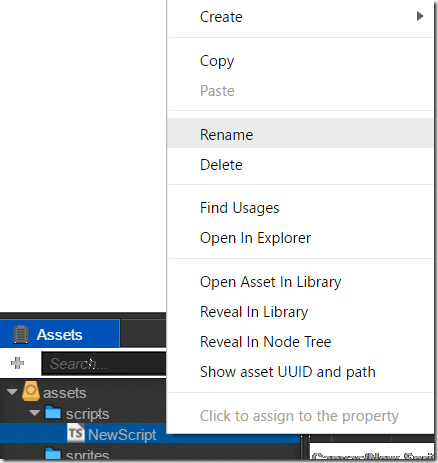
Now with your script created, right-click the newly created script and select Rename. I’m calling mine MoveScript for reasons that will make sense in a few moments.
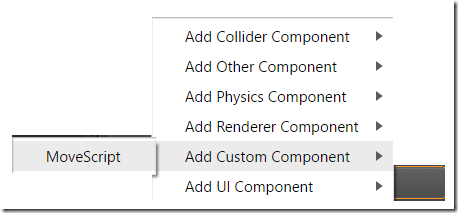
Now that our script is created and properly named, we need to attach it to an object in the scene. Let’s build on our previous Sprite example, select the sprite node we created earlier, then in the Properties panel, scroll to the bottom and select Add Component.
Click this then select Add Custom Component and now your MoveScript should be available in the list (or whatever the name of the script was in the first place).
Now that the script is attached to our Sprite, let’s actually add a bit of logic to the script. Double click the script in the Assets panel, and Visual Studio Code should automatically load. If VSC doesn’t load automatically check the menu Cocos Creator->Preferences… then Data Editor and make sure that the Code is selected in the External Script Editor section.
In Visual Studio Code, your code should look something like this:
const {ccclass, property} = cc._decorator;

@ccclass
export default class NewClass extends cc.Component {

    @property(cc.Label)
    label: cc.Label = null;

    @property
    text: string = 'hello';

    // LIFE-CYCLE CALLBACKS:

    // onLoad () {}

    start () {

    }

    // update (dt) {}
}
First things first, let’s name our class from NewClass to Mover. Our script is inheriting from the class cc.Component and you will notice it implements or can implement a number of different functions, onLoad() and update() are currently commented out. These are lifecycle callbacks and generally are how your game will handle events that occur within the game engine.
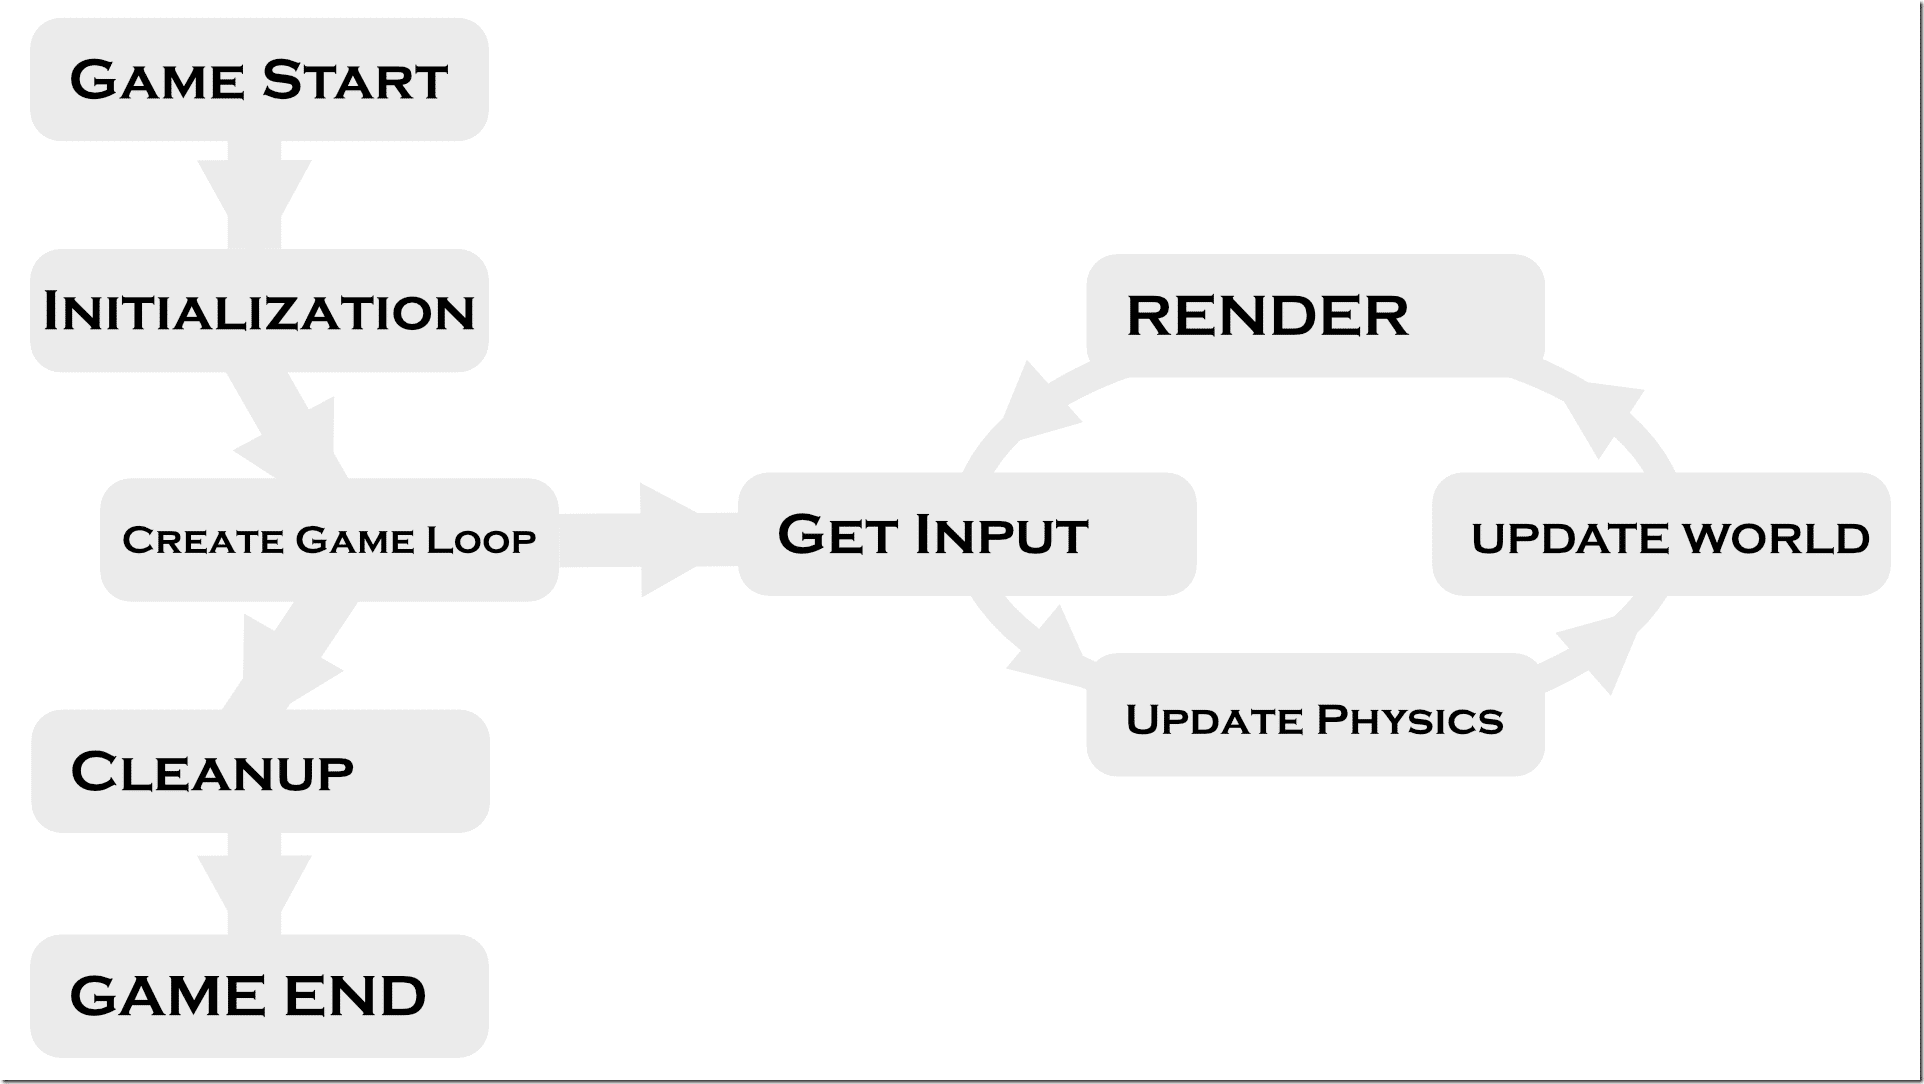
At the heart of every single game engine is a game loop, that generally goes something like this:
Essentially your program starts up, does it’s initial setup and configuration stuff, then runs in a loop over and over again, checking for input, updating objects in the game, rendering the results, until the game is told to stop and at this point, it cleans up and ultimately exits.
In Cocos Creator, you can respond to these various events by handling callback functions in your script. For example, when the game is starting up, once the scene is loaded it will then call your scripts start() function. Each pass through the game loop, it will call your update() function, etc.
For a quick and dirty example, let’s implement an update function that moves our object left until it goes off the screen, then we will loop back over to the right side of the screen. Enter the following code:
const {ccclass, property} = cc._decorator;

@ccclass
export default class Mover extends cc.Component {
    update (dt) {

        this.node.setPositionX(this.node.position.x -= 100 * dt);
        if(this.node.position.x < -(this.node.parent.width/2) - this.node.width/2)
            this.node.setPositionX(this.node.parent.width/2 + this.node.width/2);
    }
}
We can access the node our component is connected to using the node property. In this case, we move it using setPositionX(), scrolling until we are off the left-hand side of the screen. Keep in mind since our parent anchoring is set to (0.5, 0.5), we are positioned in the middle of the screen, so the left edge of the screen is -width/2 while the right side of the screen is +width/2.
Another thing to note is we move by 100 * dt. dt is a parameter passed in to update() that is the elapsed time since the last time update() was called. By multiplying this value against another value, we can convert that value into fractions of a second. So, in this case, if we are running at 60 frames per second, dt would be 1/60 or 0.01666, so 0.01666 * 100 = 1.66 pixels per update. This is a way of moving at a constant speed regardless of the rate the game loop is running.
Now let’s take advantage of a powerful feature in Cocos Creator, properties. Instead of moving at a constant rate of 100 pixels per second, let’s make this configurable. Change the code as follows:
const {ccclass, property} = cc._decorator;

@ccclass
export default class Mover extends cc.Component {
    @property
    speed: number = 100;

    update (dt) {

        this.node.setPositionX(this.node.position.x -= this.speed * dt);
        if(this.node.position.x < -(this.node.parent.width/2) - this.node.width/2)
            this.node.setPositionX(this.node.parent.width/2 + this.node.width/2);
    }
}
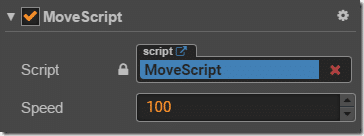
Here we defined speed as a number type property with a default value of 100. Instead of using a fixed value of 100, we instead use this.speed. The cool thing is, now if you go to the properties of our node, you can configure this value using the editor.
This gives you or your designer the ability to configure the speed without having to use code.
What’s even more powerful about this setup is we can reuse this script with a completely different sprite in your scene. So, for example, I just duplicated the sprite in our scene (right-click it in the Node Tree panel and select Duplicate), then in the new instance change the speed to something different.
Here is our example running, with one instance’s speed set to 50 and the other set to 100.



After the update to 2.1 use “setPosition(xValue, yValue, zValue)”. “Set PositionX/Y/Z” don’t exist anymore.
Awesome. Thanks Maximilian!