Introduction
With the release of CopperCube 6, there is now a free version available, making this game engine far more accessible than it was before. Therefore here on DevGa.me we have created this tutorial series that introduces you to this game engine. CopperCube is among the easiest to use 3D engines available, enabling you to make a game without requiring any programming at all, while giving you the ability to code in JavaScript if you prefer. This tutorial will take a step by step journey through the process of creating a game using the CopperCube game engine.
For this tutorial, we will be using the free version of CopperCube. The major difference between the free and paid versions of CopperCube is the requirement to display a splash screen when your game starts. Additionally, there are additional graphic effects available in the pro version, while the final version also contains the C++ source code. While we are using the free version in this tutorial, everything we cover will be applicable to all versions of CopperCube available.
There are two ways to acquire CopperCube, you can go directly to the CopperCube website and download there, or you can download the engine using Steam. Make sure you locate the 6.x version, as both 5.x and 6.x are available on Steam and are very different downloads due to the license changes! If you own a commercial version of CopperCube 5, this tutorial should mostly still be applicable, but the 5.x free version is very limited in functionality. CopperCube is available in both Mac and Windows versions, sorry Linux developers, there is no native binary although apparently it runs just fine in WINE.
Creating a Project
Let’s start things off by creating our first project. When you first launch CopperCube, you will be presented with this dialog:
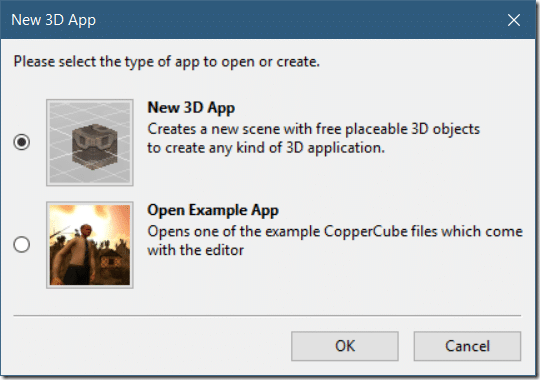
Simply select New 3D App, then click OK. You will now be presented with the main CopperCube interface:
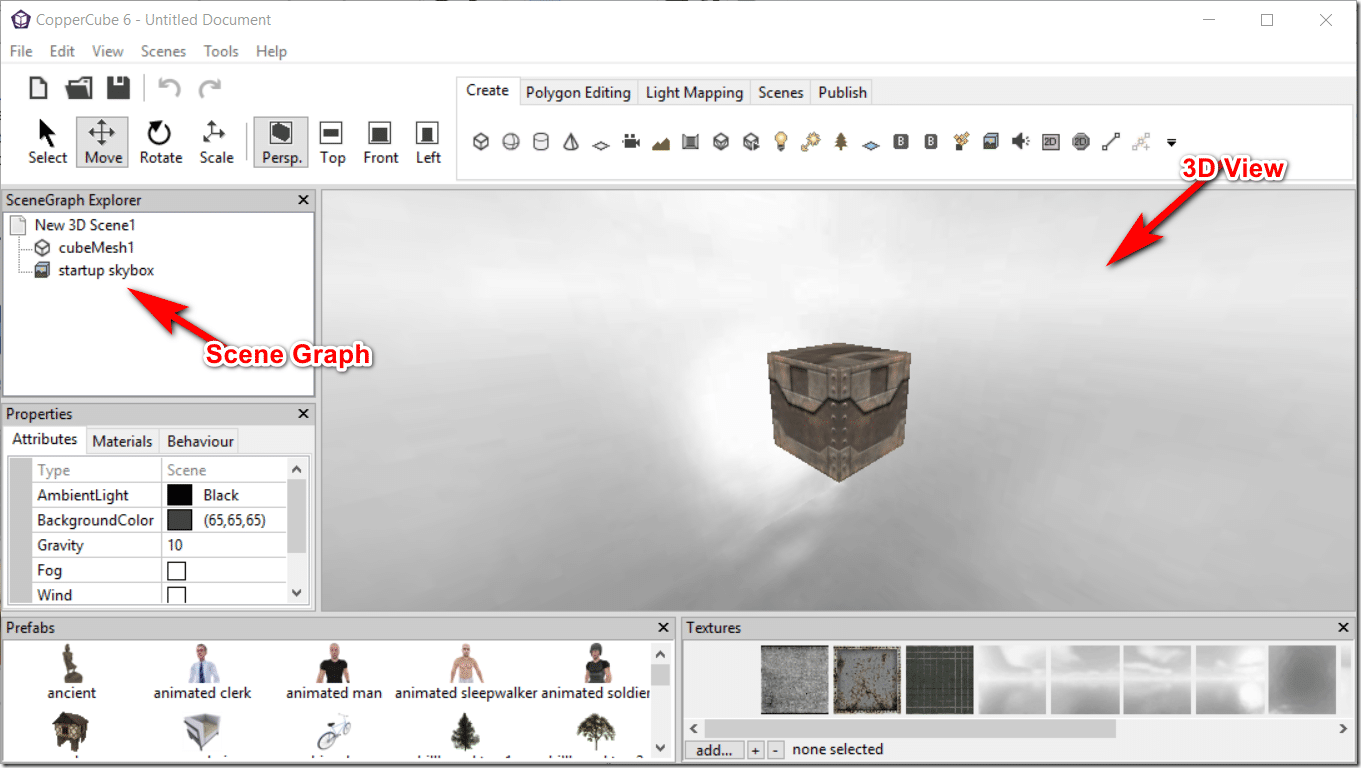
By default, our scene consists of a textured Cube mesh and a skybox. A skybox is simply an inverted box with sky textures pasted on each face, giving the illusion of a sky around the scene.
The 3D view is your eye into your game world. You can pan the view around by holding down the middle mouse button. You zoom in and out using the scroll wheel or by holding down the right mouse button. Left-click on objects to select them. The selected objects’ details will be displayed in the Properties panel.
You can switch between selection, translation, rotation, and scaling using this toolbar:

You can also accomplish the same thing using the Q, W, E, and R key respectively.
This toolbar can be used to switch between predefined cameras:

These can also be selected using F1, F2, F3, and F4 respectively.
You can also have multiple viewports into your scene. Simply select the menu View->Add Viewport then choose the starting position of the camera.
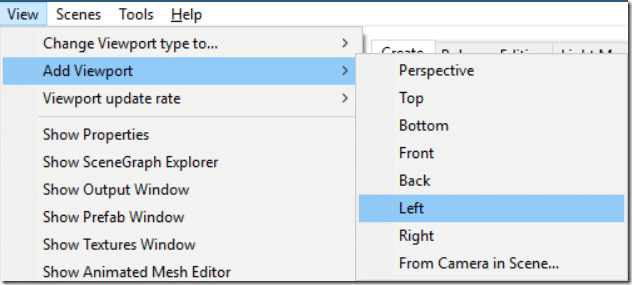
This will create a new window showing the selected viewport. This can be handy if you have multiple monitors. However, if you are using a single display you may instead want to dock this window into the main interface. Simply drag the window over the area you’d like to dock it to and a gray rectangle will be displayed. Let go of the mouse button to dock in this location:
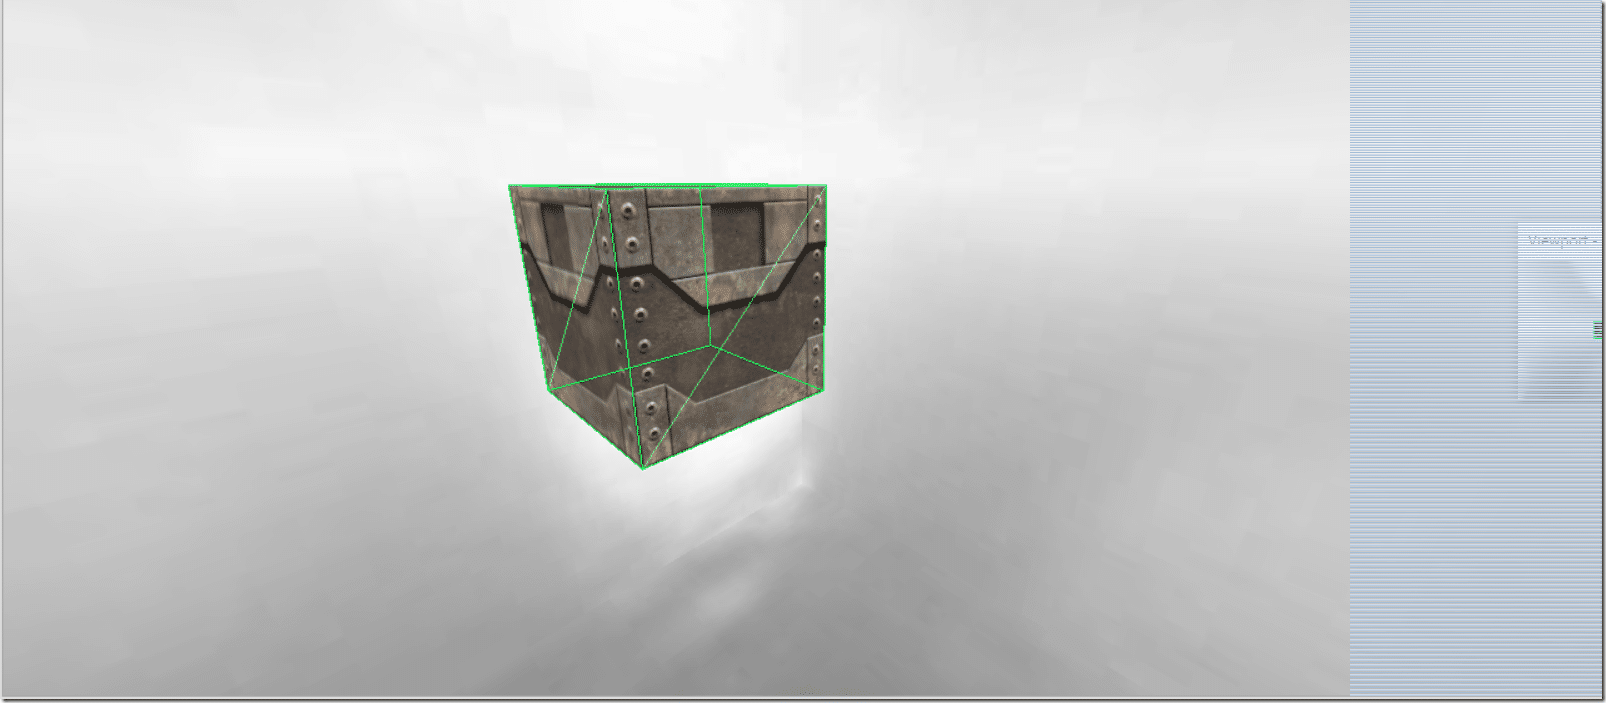
You can then resize the windows by clicking the pane between them. You can continue to add more and more viewports until things are configured the way you prefer:
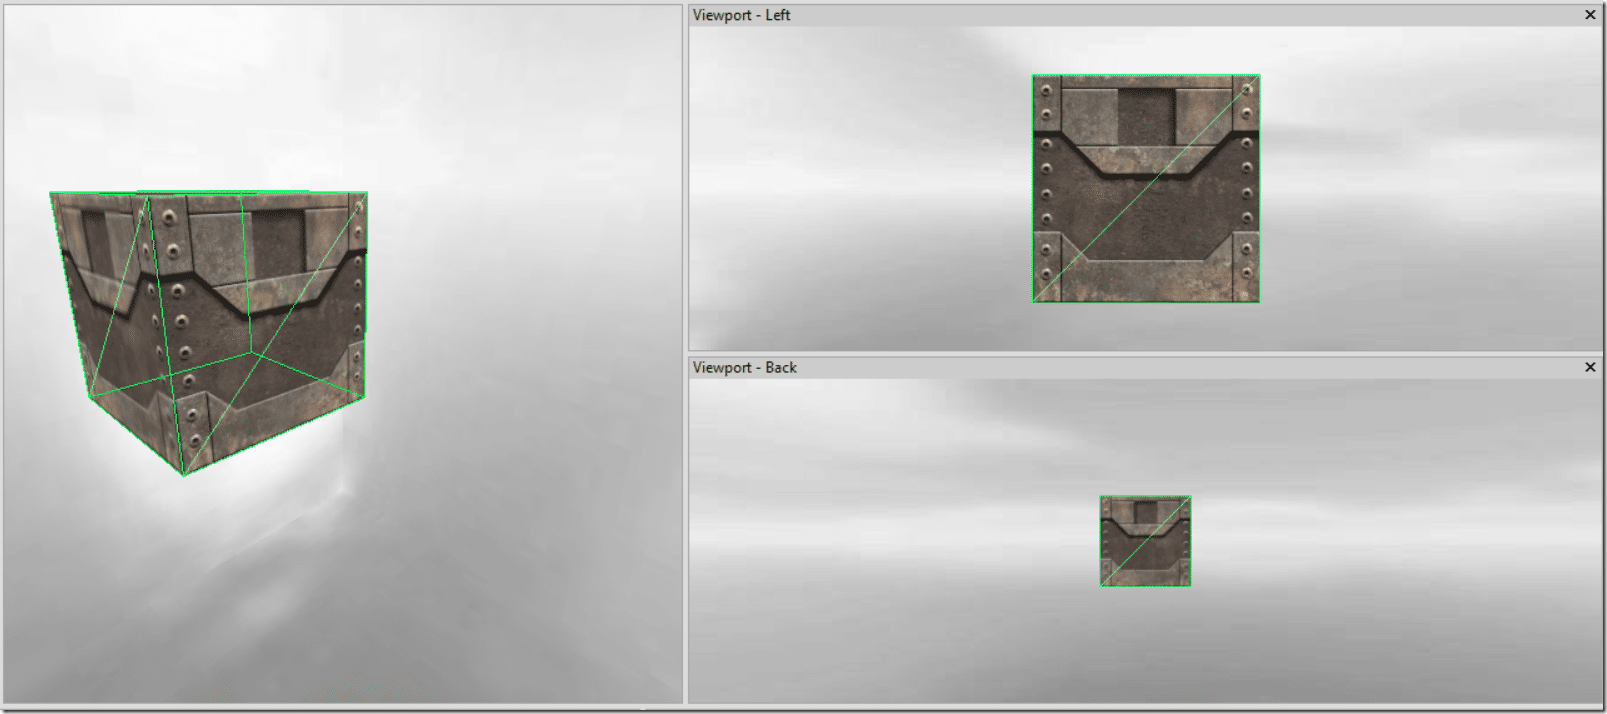
You can also remove all but the default viewport by clicking the X in the top right-hand corner of the viewport. If you would prefer a wireframe view, simply click Ctrl + W with the desired viewport highlighted. Hit Ctrl+W again to switch back to textured mode.
Creating and Running Your Application
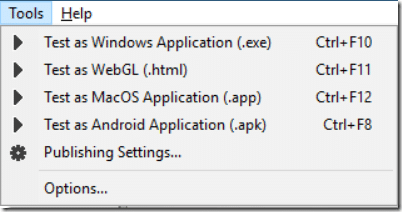
Now that we know the basics of the user interface, let’s take a look at how you run your application. Simply select the Tools Menu then select the target you want to build for or use one of the hotkey combos shown to the right, such as Ctrl+F10 to run the EXE version.
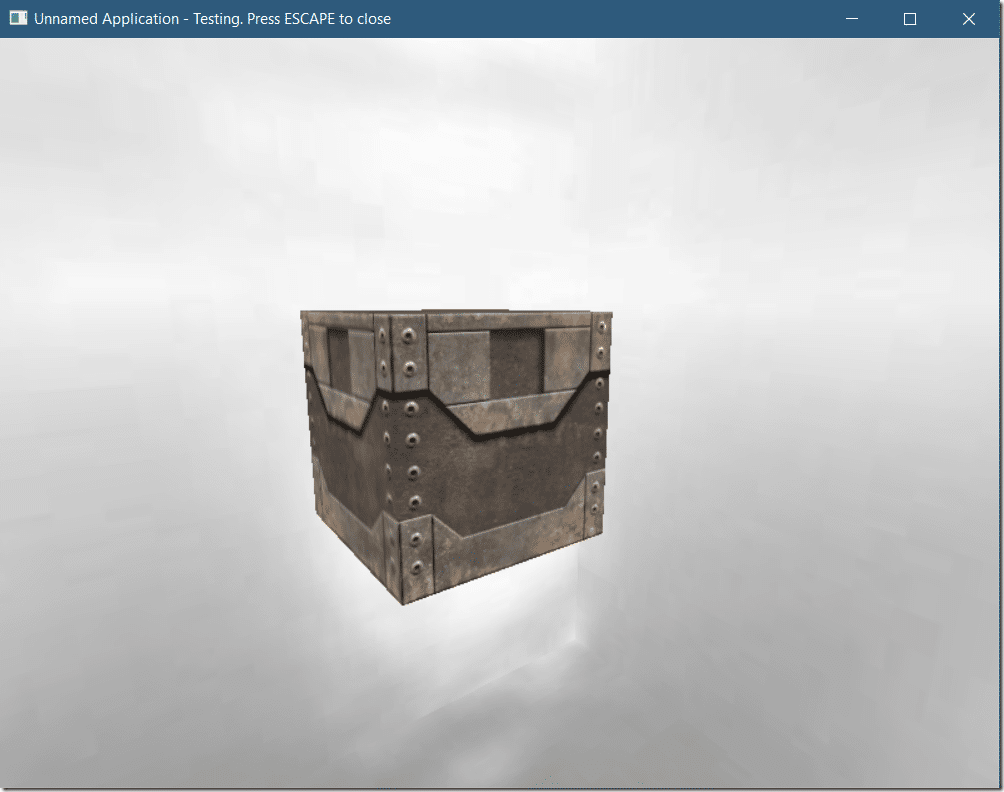
Assuming everything went correctly, your app should be displayed in a new window.
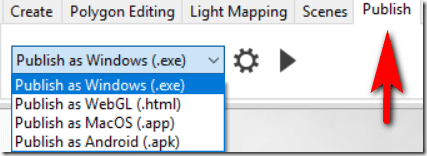
You can also create/run a game build using the toolbar panel at the top. Select the Publish tab, then in the drop-down pick your build target then hit the play icon.
Notice the Gear to the right of the drop-down? This is the same as the Tools->Publishing Settings… menu and is where you configure the properties of your game. In the General tab, you can configure some top-level details of your game like the Title, configure the loading screen, etc.
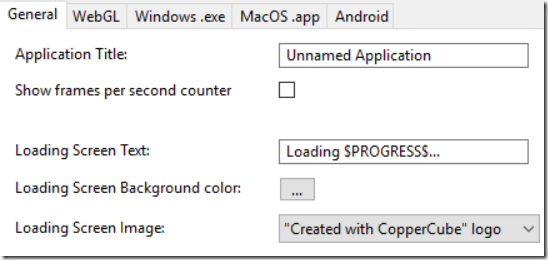
Additionally, there is a tab for each additional platform. Here you can configure platform-specific details. Here, for example, are the settings available to the Windows target:
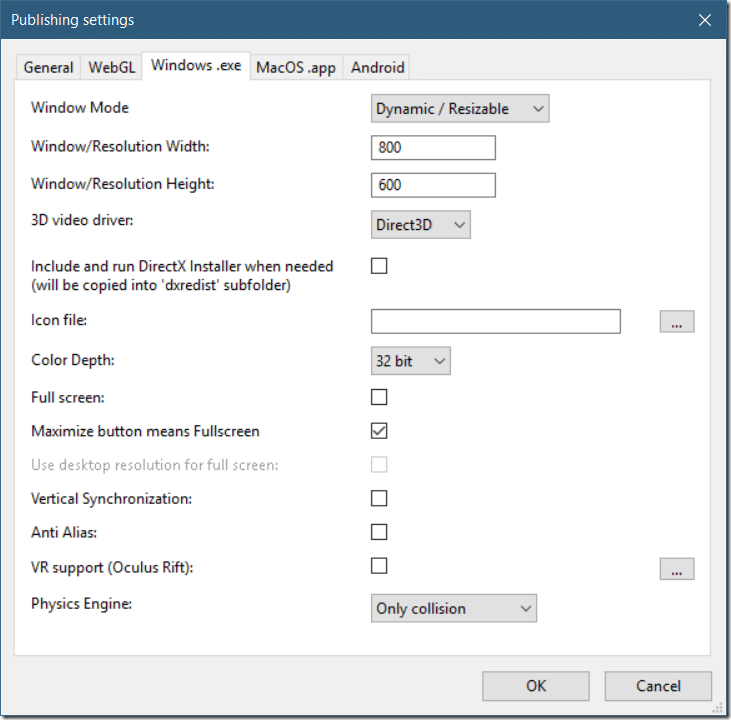
As you can see some more important settings are available here, such as the ability to set the size of your application window, if it’s full screen, resizable, what GPU driver to use, and much more. The settings vary from platform to platform. Notice the Physics Engine setting here… we will revisit that shortly!
By default, you will have mouse look enabled, so move your mouse around to look around your world. We will look at customizing this behavior in a later chapter. Hit the Escape key to stop running your game. That’s it for now. In the next chapter, we will look at creating a game world and populating it with… “stuff”!
