In this chapter, we are going to look at creating bullets that our Player will be able to fire. Just like when we created our Player class, the bullet class is simply another 2D scene. Go ahead, create a new Scene, create a scene of type 2D scene then rename the root node to BulletRoot. Now save the scene as Bullet.tscn.
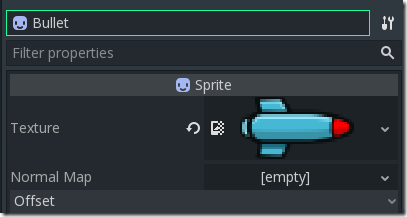
Now create a new child node of type Sprite and rename it Bullet, then copy the file /assets/graphics/bullet/bullet.png and apply it to the Texture field like so:
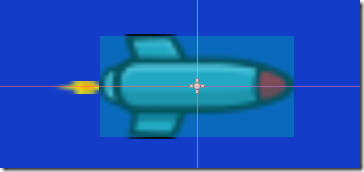
Make sure that your newly created sprite is centered at the origin (0,0) like so:
Now let’s add a bit of graphical flair to our bullet by applying a flaming contrail. With the Bullet sprite selected, add a child node and select AnimatedSprite. With the AnimatedSprite selected, in the Inspector drop-down Frames, then select New SpriteFrames:
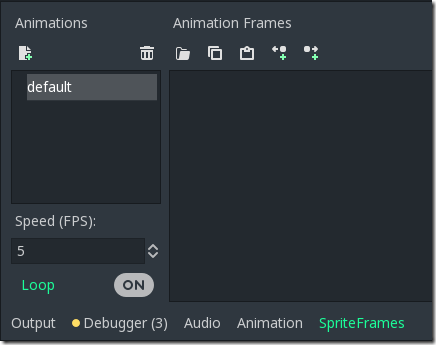
Now drop down the newly created SpriteFrames object, then select Edit:
This will bring up a new editor near the bottom of the screen.
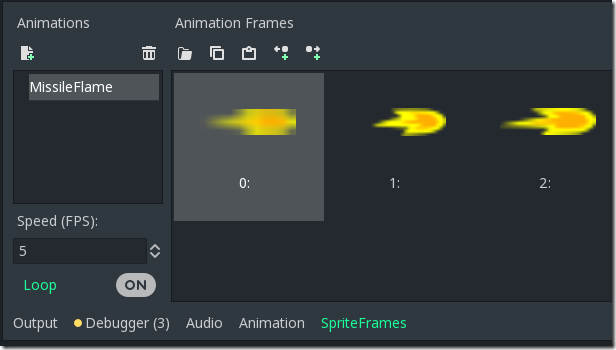
Select default and rename it MissileFlame. Next drag and drop the files flame, flame1 and flame2.png from assets/graphics/bullet and drop them to the right, like so:
Make sure that loop is still on. Customize Speed(FPS) to your preference. 5 FPS will work.
Select Animated Sprite, make sure Playing is checked. While we are here, we want to make sure the flame shows behind the bullet sprite, in Node2D set Z Index to -1.
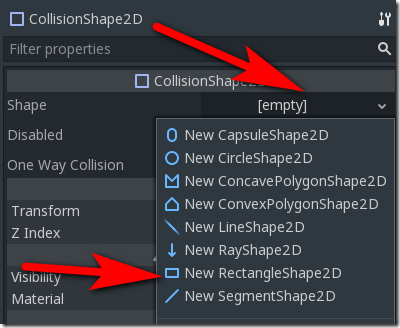
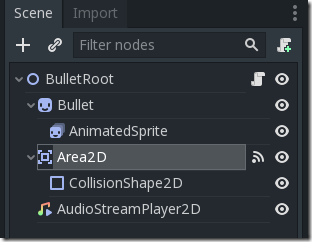
While we are here, we want to set up a collision shape for detecting if our bullet hit something or not. While BulletRoot selected, add a Child Node of type Area2D. With Area2D selected, create a child node of type CollisionShape2D. Click the Shape drop-down and select New RectangleShape2D.
Select the newly created RectangleShape2D in the Shape dropdown, select Edit, then change the Extents x,y values so they contain most of the bullet sprite.
The result should look something like(but animated!):
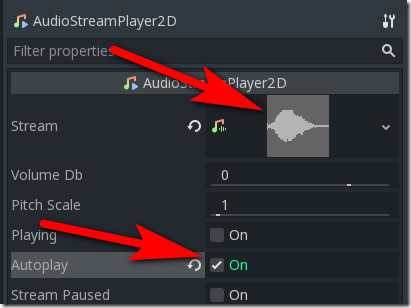
Now let’s play a sound every time a bullet is created. To do this, select the BulletRoot node, then add a child node of type AudioStreamPlayer2D. With the AudioStreamPlayer2D selected, drag the file assets/audio/rocket/rocket.wav and drop it on Stream and set Autoplay on, like so:
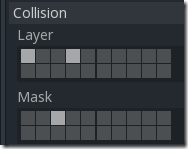
This means when our bullet is created, this sound will automatically play. Let’s configure one more thing before we script our bullet’s behavior. We want to set up Collision Masks for the Area2D on this bullet. These tell Godot on what layers the bullet exists and more importantly, what layers Bullets interact with. This way you can say a bullet can hit an enemy, but not another bullet or the player for example. We will define these layers shortly, but let’s do some initial configuration now so we don’t have to return to the Bullet class.
With the Area2D node selected, check off the following boxes:
Don’t worry, this will make more sense shortly.
Finally, let’s attach some logic to our bullet. Attach a new script to the BulletRoot and enter the following code:
extends Node2D

# Called every frame. 'delta' is the elapsed time since the previous frame.
func _process(delta):
  move_local_x(delta * 400)

func _on_Area2D_area_entered(area):
  if(area.get_collision_layer_bit(2)):
    queue_free()
This code simply tells the bullet to move forward at a rate of 400 pixels/second. The second function _on_Area2D_area_entered() is called when the Area2D of our object collides with another Area2D. If that area has the 2-bit set (meaning it’s an enemy), we simply get rid of the bullet by calling queue_free().
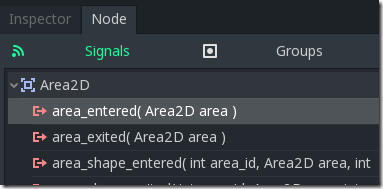
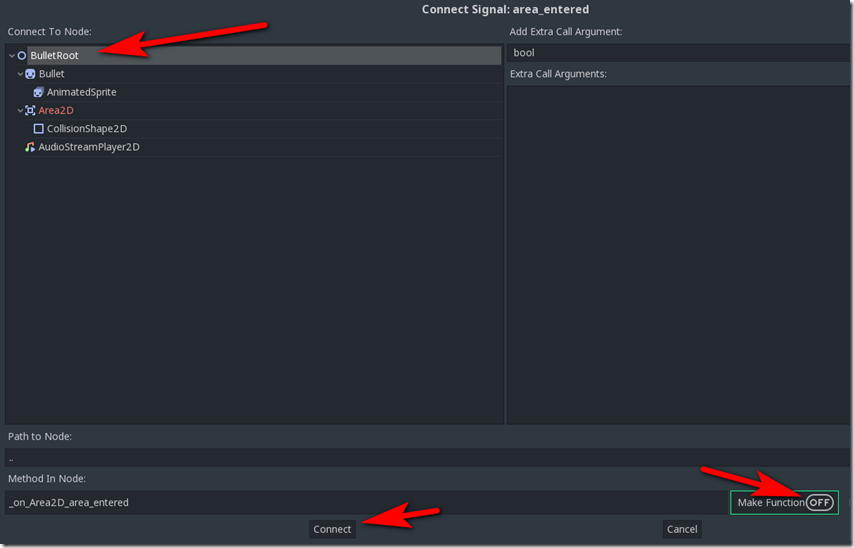
Finally, we have to wire this function up to the area_entered event. With the Area2D selected, go to the Node tab and double click on area_entered()
Now we wire it up to the script attached to BulletRoot. Select BulletRoot, then Make Function to Off and finally Connect.
And done. We did quite a bit in this part of the tutorial, so here is a recap of how your final Bullet node should appear:
Now we can fly, dodge enemy aircraft and shoot! You might notice however when our bullets hit the enemy… nothing happens… that’s not ideal, is it?

