One of the most common tutorial requests I receive is “How do I export my 3D models from Blender to Godot?” and this is a very consistent pain point, regardless of the game engine used. So that is exactly what we are going to do in this tutorial, create a simple but rigged, animated and textured model in Blender 2.79, then export it for use in the Godot 3.1 game engine. If I miss a point, I have created a step by step video of the process of exporting from Blender to Godot as well. Alright, let’s jump in.
Creating and Texturing Your Model
The first thing you need to do is model your um… model. The outcome really doesn’t matter, so I’m just going to focus on the parts that are important to the exporting process. One thing to keep in mind, you are going to want to have denser polygons at the “joints” where your armature is going to bend or deform. Using a combination of extrusions, scaling, and bevels in edit mode, I created the following simple model.
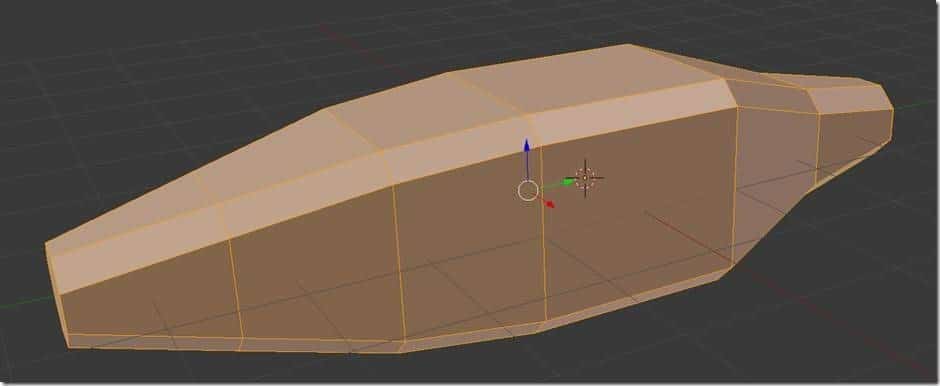
It really doesn’t matter what you model, the important part is you create a UVMap for it. The easiest way is to switch into Edit Mode, hit A to select all of the faces, then hit U in the resulting menu select Smart UV Project:
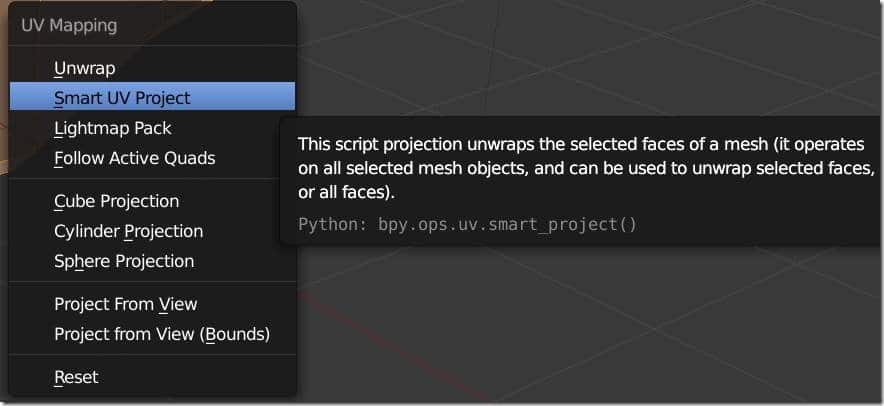
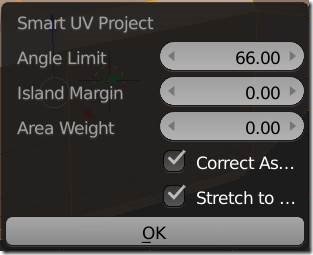
Another dialog will pop up, the defaults are fine, simply click OK.
Now that we have our UV Map, it’s time to apply some textures. First, you are going to need a texture map, you can find tons of free textures over on the DevGa.me Free GameDev resource page. For this example, I download the 2k resolution version of this texture from CC0Textures. Simply extract the contents of this zip file into a directory. Now that we are at it, save your Blend file to the same directory as the textures.
Now in the 3D view, switch to Object mode(this can be done with the TAB key as well as the combo box below).

With your Object selected in the 3D view, check in the Materials tab in the Properties window to make sure that there is a material (there should be). If there isn’t, make sure you create one.
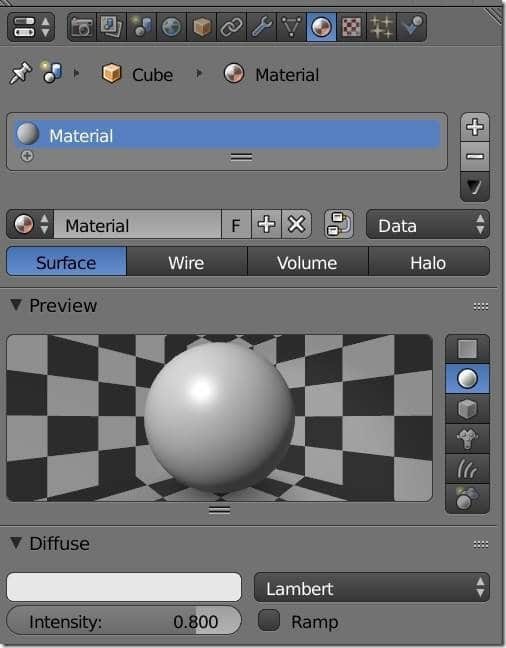
The name you specify here is the name you will get when imported into Godot. Since Material is pretty generic, I’m going to simply rename it to Thing1Material, like so:
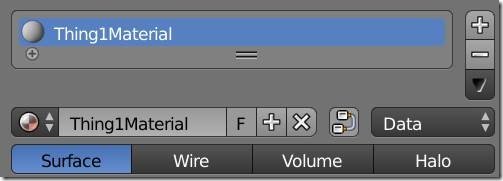
Simply double click the string to enter edit mode and rename it to whatever you want. That should be it for the Materials Tab. Now switch over to the Textures tab. There are several steps here, so I’ve illustrated them in the graphic below.
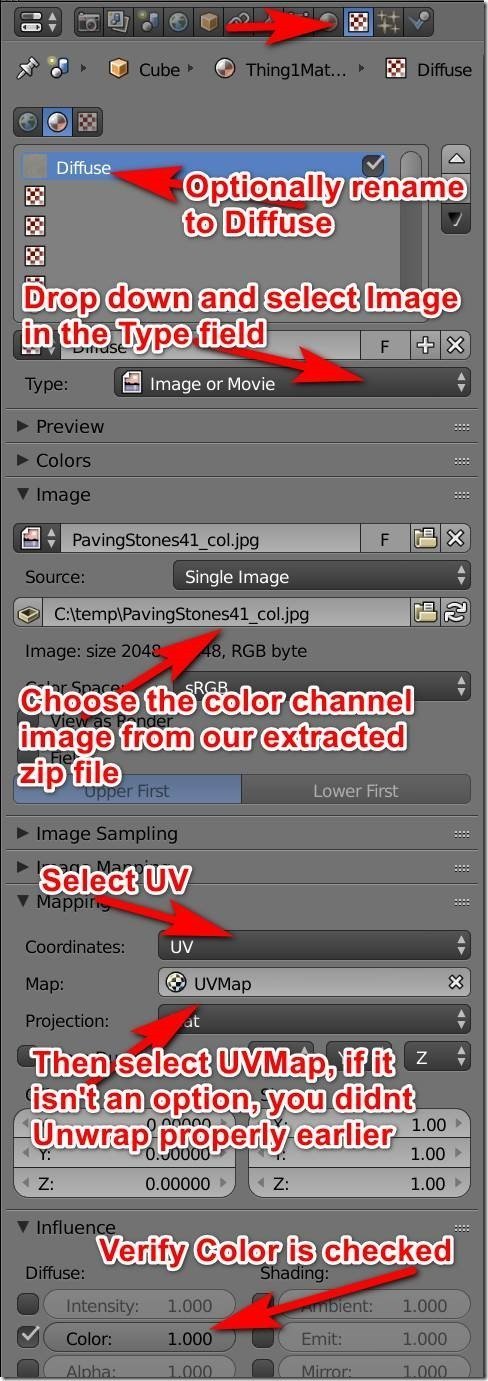
Now we are going to repeat the same process, this time for the normal map. Next, select the next empty spot in the Textures panel, then click new:
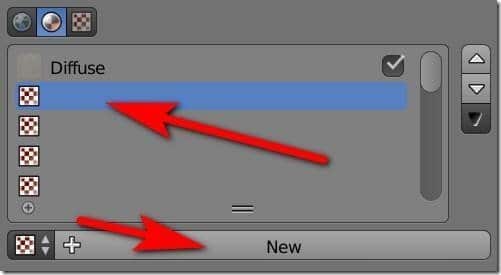
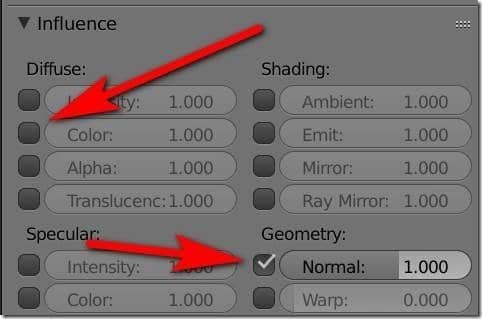
Once created, rename it to normal, then repeat the above process, this time selecting the normal map from the extracted archive. The only difference between the color and normal channel is we turn off color and instead enable normal, like so:
At this point, if you switch the viewport to Material mode, your model should have a texture and normal map, like so:
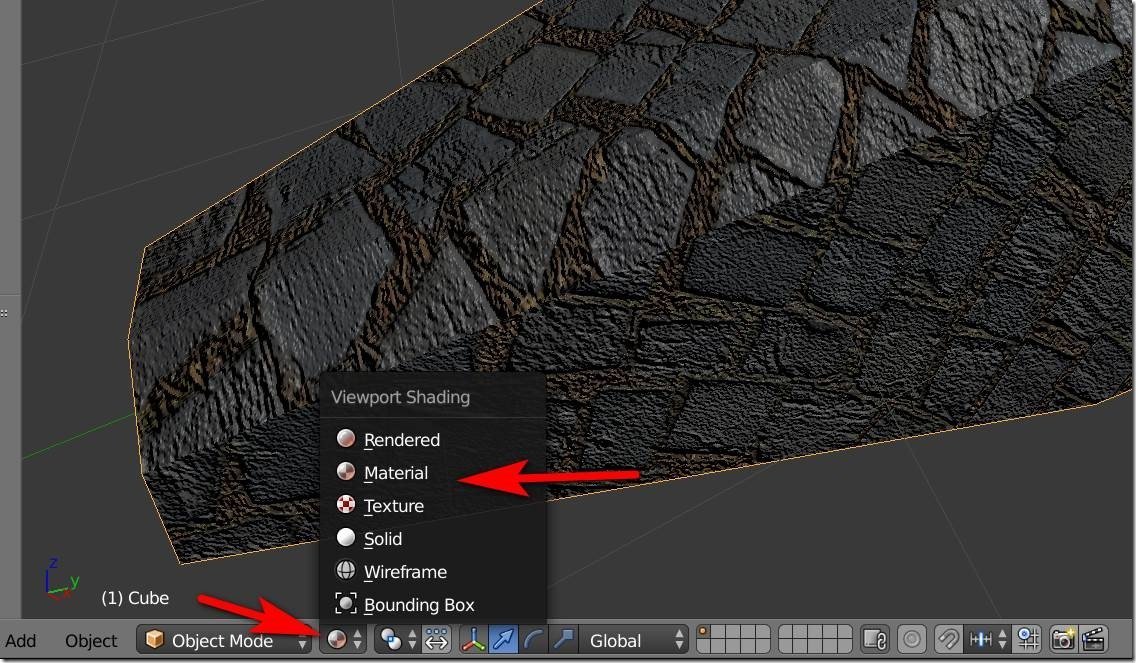
Woot… our model is done and ready for animating. Now let’s start with animating.
Rigging the Model
First things first, we have to create an armature to control our animation. With the 3D cursor inside our mesh, select Add->Armature->Single bone.
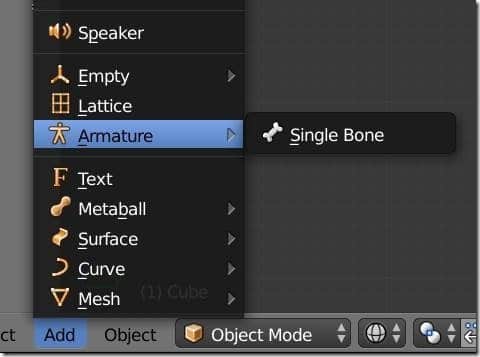
You may have to translate and rotate your bone so that it’s properly oriented at the base of your mesh. With the bone selected, switch into Edit mode (Tab), then hit E to extrude and create another bone. Repeat this process a couple of times so your model looks something like this (hit Z for xray mode if needed):
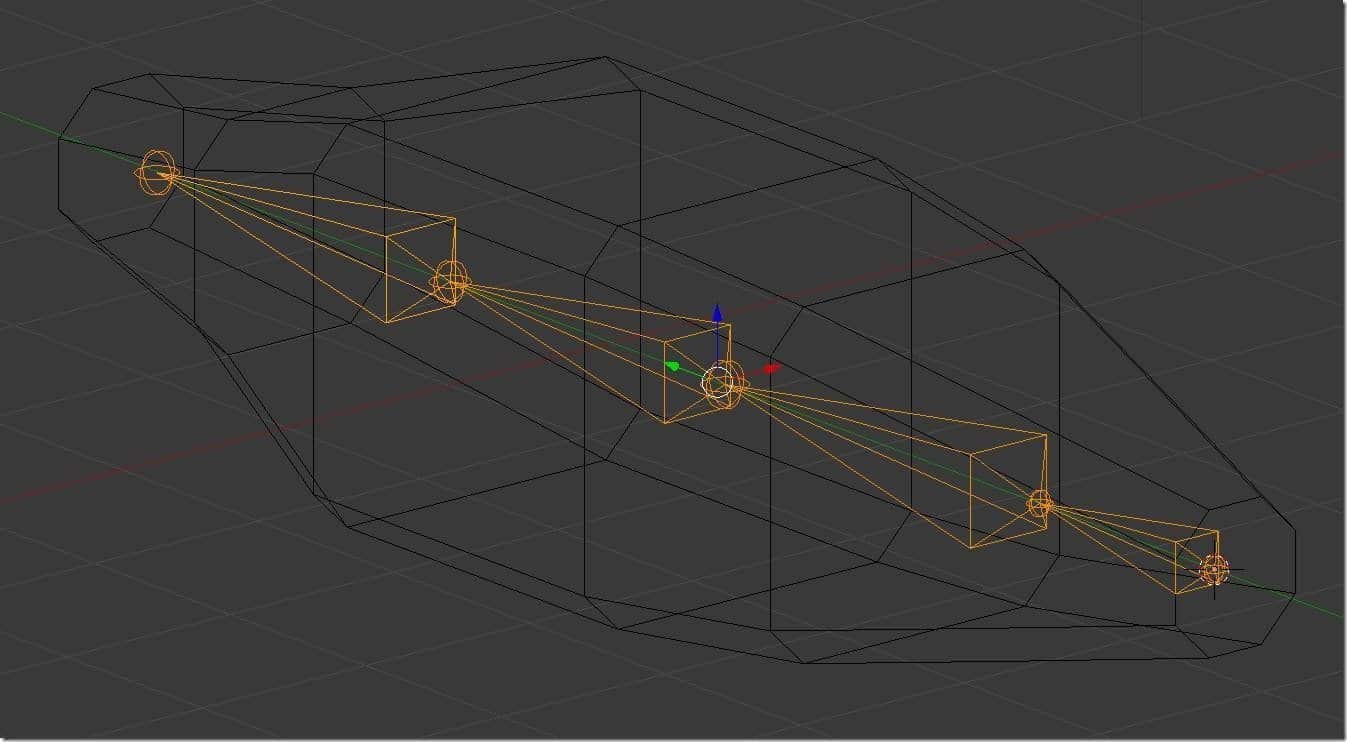
Now hit TAB again to switch back to Object mode. Now select our polygon mesh, then holding SHIFT down, select the bones. Next hit SHIFT+P to parent the mesh to the bones. This will pop up another window, select Automatic Weights:
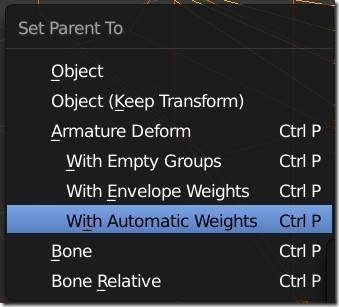
This will set the influence of each bone over the mesh. We are now ready to start animating.
Animating the Model
Now we are going to configure a pair of animations. To do this we are going to need to open 3 different windows, the Timeline, the Dopesheet, and the NLA Editor.
First, select one of the bones in your armature and switch to Pose mode. We are going to make our animation very simple, 50 frames of keyframed bone animation. In the timeline, set the End value to 50 frames, like so:

Now that we are in pose mode, we should be able to select individual bone positions, which will cause the attached mesh to deform. In the timeline, make sure you are at frame 1, like so:
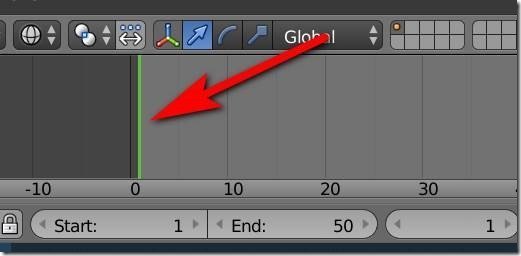
Now in 3d view, hit A until all the bones are selected, then press I (as in the letter i) to insert a keyframe at this position. In the resulting menu, select LocRotScale
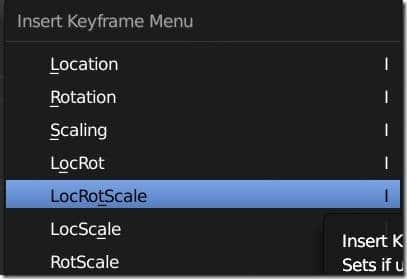
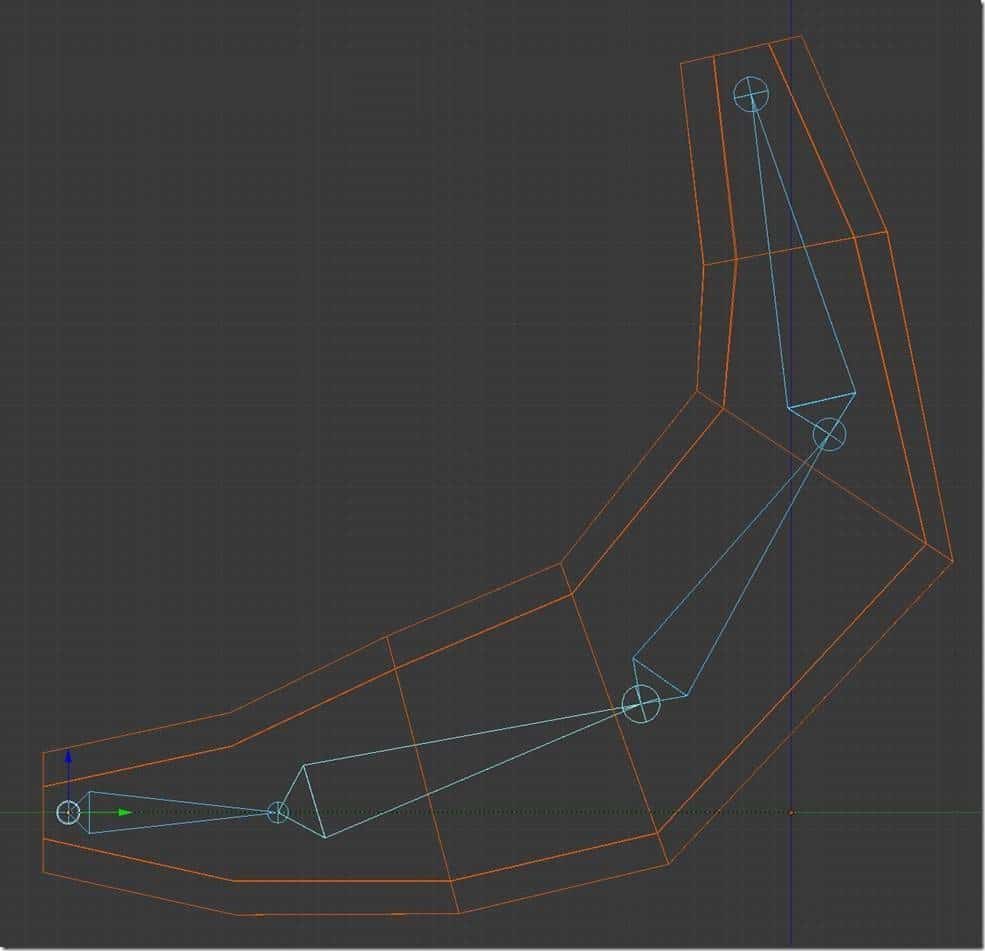
This will create a keyframe for every bone in the animation. Now in the timeline advance to the 25th frame, rotate a few bones in Pose mode in the 3D view, hit A again until all of the bones are selected and once again hit I and create another key. Repeat this process once again at the 50th frame. Your model should look something like this:
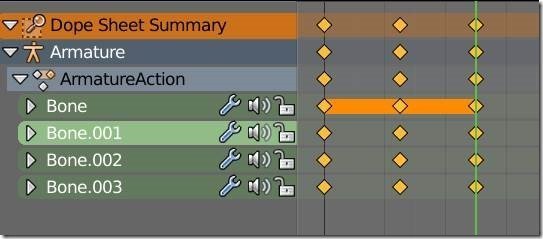
And in the dopesheet and NLA editor, you should see multiple keyframes you created:
Now switch over to the NLA Editor. We want to rename our animation something other than ArmatureAction, then hit the commit button.

Once complete, you should see something like (if you named yours BendUP as I did):

Now we want to create another animation. Switch to the Dopesheet, then switch to Action Editor:
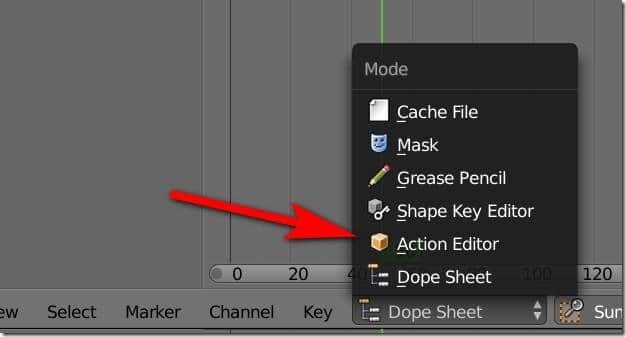
Now click the New button to create another animation.

Now you can repeat all of the above steps (pose model, create keyframes across the timeline, rename and commit the action). Do this over and over for all of the objects in your scene. Here is the end result with two animations defined.
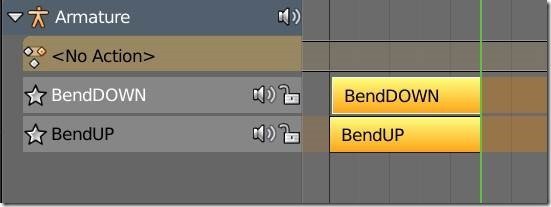
Now the final AND MOST IMPORTANT PART! Be sure to mute each channel or they will not export right. In the NLA Editor, click the little speaker icon next to each animation so they are off, like so:

Installing the Better COLLADA exporter
Now we are ready to export our textured and animated model! Well almost. First, we need to install the Better COLLADA plugin. Download the zip file from the Godot download page. Scroll down and locate the exporter:

Remember where you saved it.
Now in Blender, select File->User Preferences. Then switch to the Add-ons tab, then click Install Add-on from file and select the zip file you just downloaded.

Once done, make sure the checkbox next to it is set:
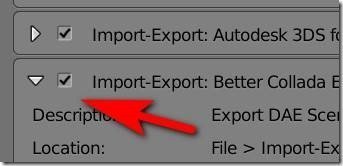
If you want to keep this plugin always available, click the Save User Settings button.
Exporting your Model
With our exporter installed, the rest is pretty easy. Simply select File->Export and Better Collada should now be an option.
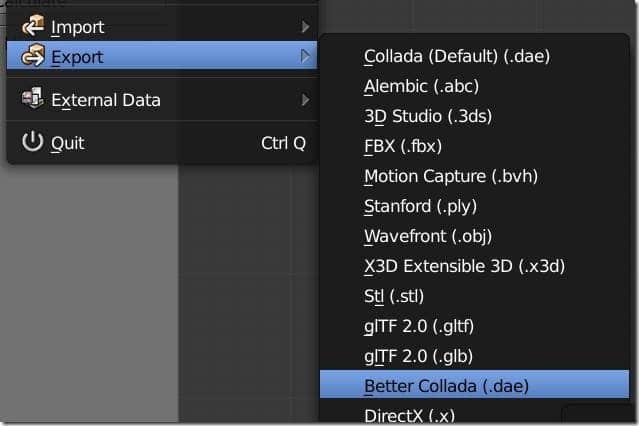
Export to the same location you saved the textures earlier. The final setting is configuring the export options. Here is what I used:
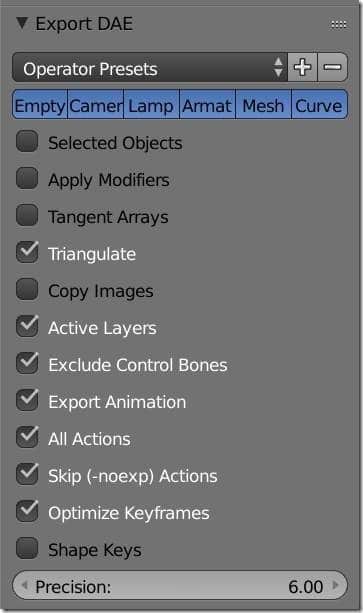
Importing to Godot
This really couldn’t be easier. Simply copy the generated DAE file, as well as the textures into a Godot project’s file directory. Godot will automatically detect and import them.
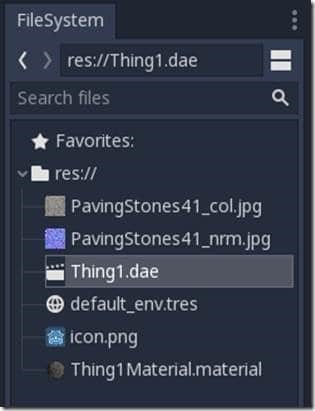
Notice the generated Material matches the name we gave earlier. Create a 3D scene and drag the DAE file into the scene. Let’s make sure the animations work. In the Scene window, click the Open in Editor button:
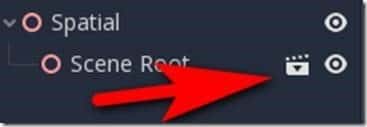
You will then be prompted on how you want to proceed… pick either option that isn’t cancel.

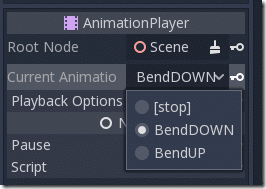
Select Animation Player in the newly opened scene.
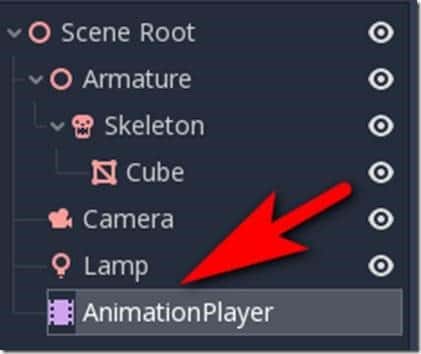
Next verify that your two animations imported:
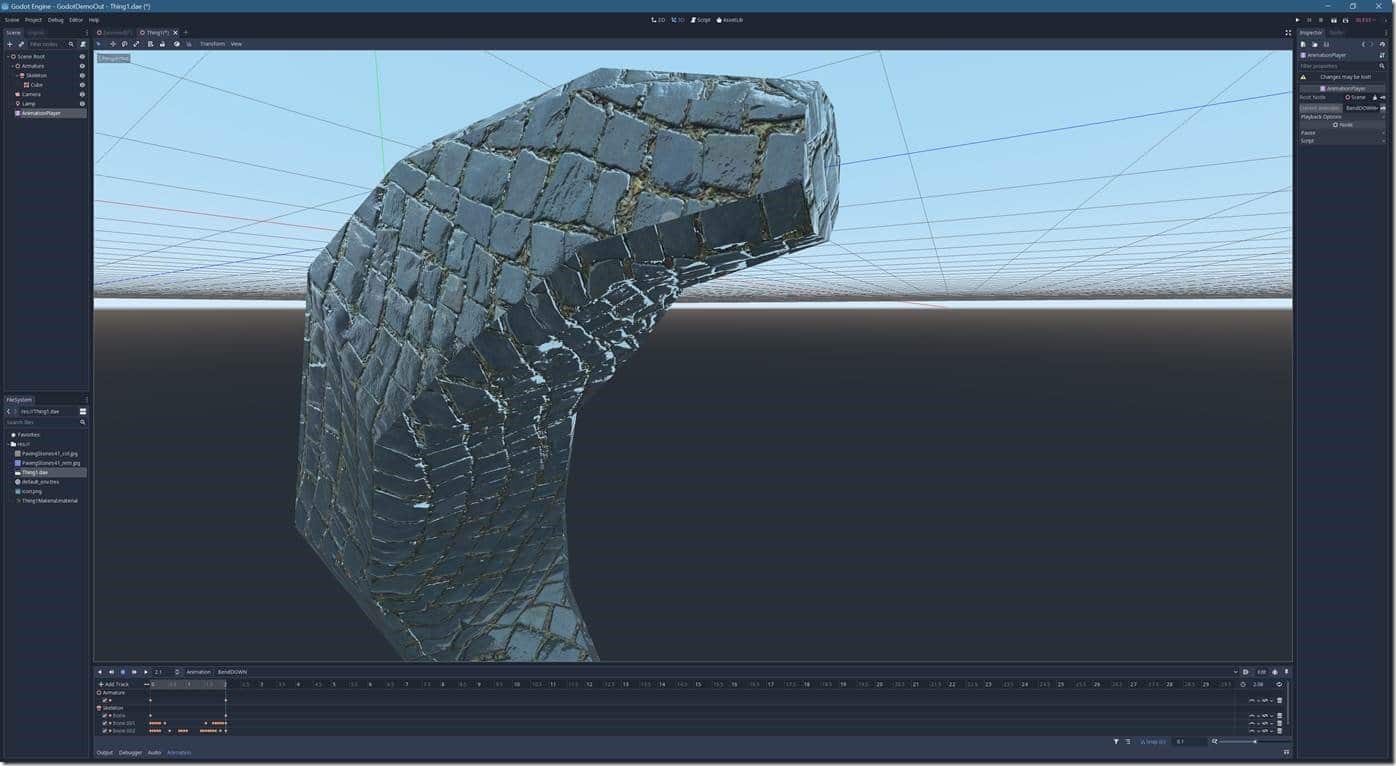
And voila! A fully textured, animated object imported to Godot!
What other options are there?
This video covered using the Better COLLADA exporter, as it is the de facto standard way of exporting to Godot right now, but by no means is this the only option. There is also a dedicated Godot exporter for Blender under development, available here. There is also the option of using glTF2, an open standard by the Khronos group. For Godot 3.2, there is a project underway to support Assimp with a focus on FBX support. The problem is, all of these options are currently under development and cannot yet be considered reliable. If Better COLLADA doesn’t work for you, be sure to check out one of these alternative options.
Finally, there is the option of exporting using the OBJ format, which is very reliable but does not support animations and advanced texturing options. If you have a static simply textured object, the OBJ exporter is extremely reliable and requires no additional plugins.
