Now that we have a fully populated world, let’s create a camera object. You create a Camera the same way you created Terrain or Water items, simply select Create then choose the Camera icon.
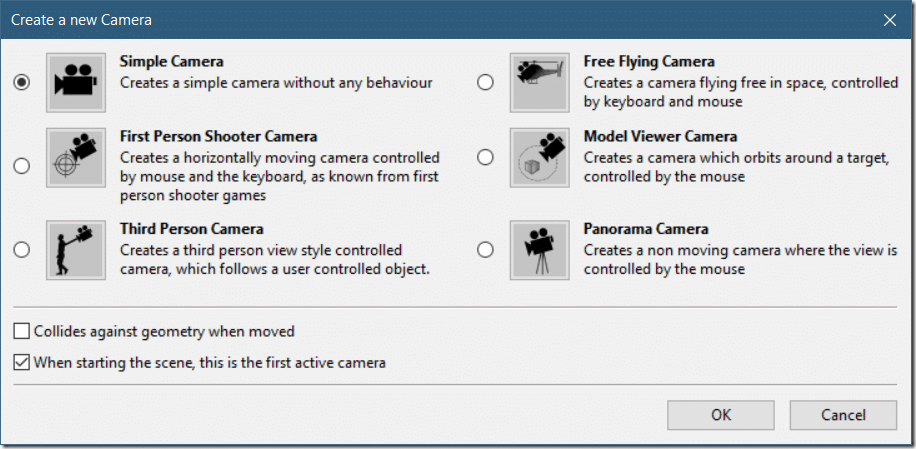
Of course, you can also create a new camera by right-clicking, selecting Insert->Create A Camera. No matter which way you go, it will result in this dialog:
All are ultimately the same type of object, just with different behaviors attached. We will look at behaviors in the next chapter. For now, just pick the camera with the description that best fits your required behavior. I am going to create a Third Person Camera, as I want it to follow our cube around the scene. Notice the two checkboxes, these are critical. The first one causes the camera to collide with geometry in the scene instead of passing through it. The second checkbox makes this the active camera when the scene is started.
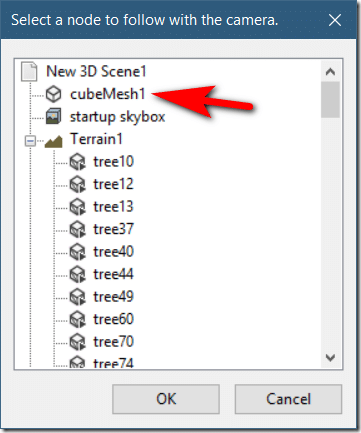
When you select a 3rd person camera, you will next be prompted for which item this camera should follow.
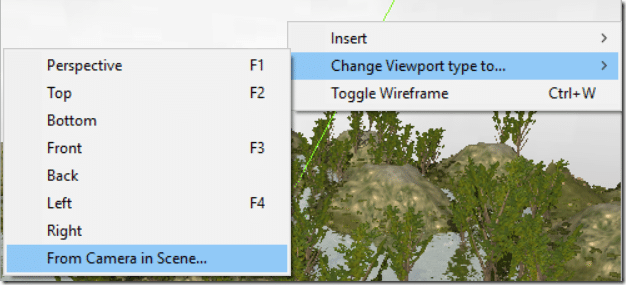
In this demo, I am using the default cube created when we first created our level. Now that you have a camera, you are probably going to want to be able to see what it sees. You can’t do this in the default viewport, so you will have to create at least one additional viewport. Click somewhere in your new viewport and select Change Viewport type to… From Camera In Scene…
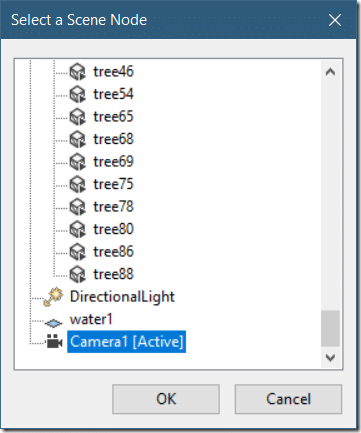
Select the camera from the list of objects in the Scene:
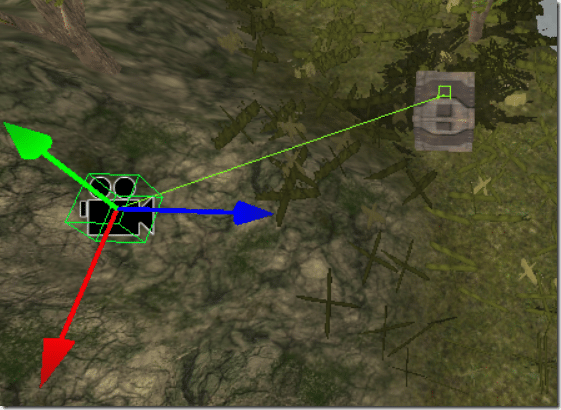
You can now position the Camera in the scene. You will notice a line is drawn between the camera and the target at all times.
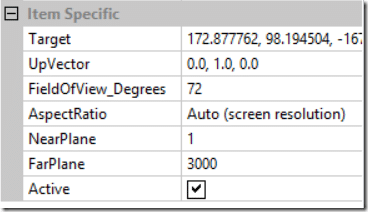
You will notice with the camera selected there are several key properties available for camera objects:
The aspect ration can be specified, but by default will be determined by the screen resolution, keep in mind this value can be configured in the settings section of the Publish tab. Near and far plane tell you the near and far range of the camera, basically the minimum and maximum damage in the scene the camera will be able to see. Field of View is another important value, specifying the angle or range in degrees that the camera can see in the scene. Finally, the active checkbox is what determines which camera will be used when the scene is loaded.
Now when you move the cube around the scene, this camera will automatically follow it. Now… on to adding some logic to our game!


