Alright… back to our Title Scene… time to add a couple of buttons, one to start the game, and the other to exit it. This effectively makes our title screen also our main menu.
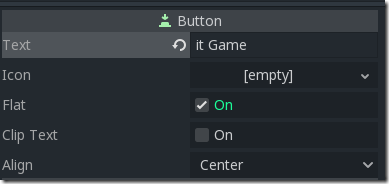
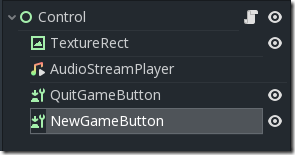
Start by adding a ToolButton to the scene, parented by the root Control node. I then renamed it QuitGameButton. Once created, you can set the Button text in the Text field in Inspector.
Creating A Font
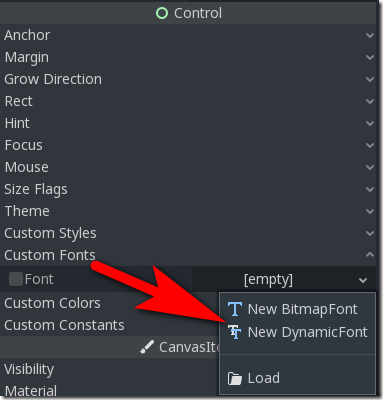
The button will use the default Font, which doesn’t really look all that great, so let’s create our own. Scroll down to the Control section of the Inspector, then locate Font, drop it down, and select New DynamicFont.
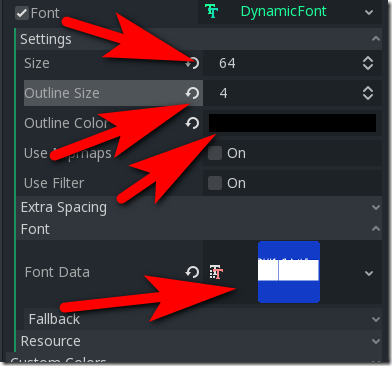
Next, double click the newly created DynamicFont to expand its options, then set the following values. Size = 64, Outline Size = 4, Outline Color then choose black. Finally, drag the file animeace.ttf from the folder assets/fonts/ and drop it on the Font Data field.
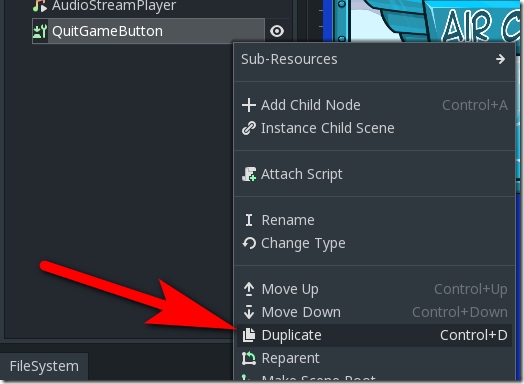
Now our button will look much more interesting… but we need two. Let’s simply Duplicate our existing button, rename it to NewGameButton, and set the Text property to New Game. To duplicate, simply right click the existing button in the Scene tab, and select Duplicate:
Your final Scene should look like:
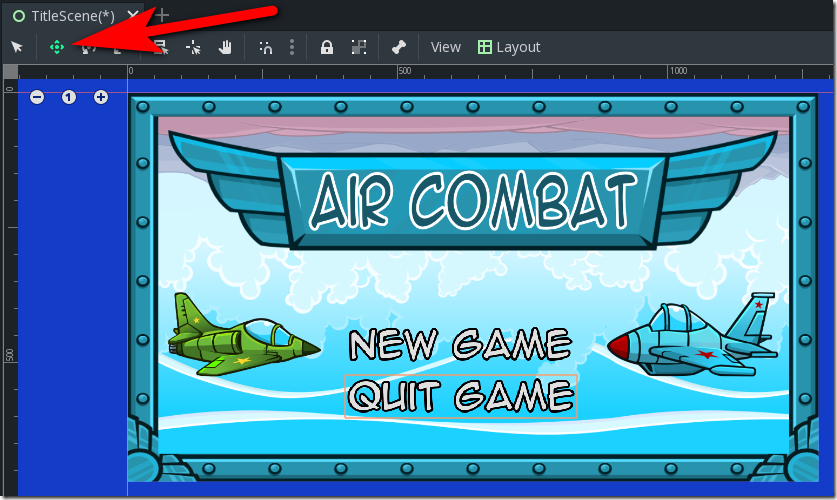
We also need to position each object in the scene. Simply select the button, select Move mode in the 2D view, and position each button.
Finally, we want to actually wire the buttons up to do something!
Handling Events/Signals
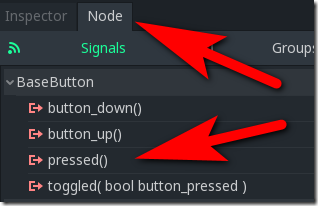
Select one of the buttons, switch to the Node panel, and double click on the pressed() signal.
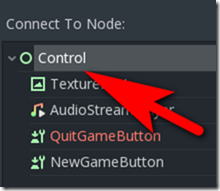
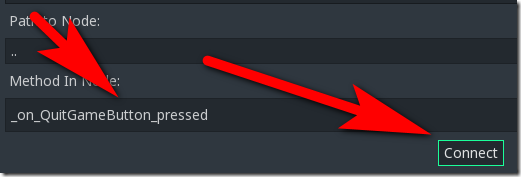
This will bring up a dialog where we configure the code that will be fired when this button is pressed. We are going to reuse the script we already attached to the root Control in the node, so select it.
Since we named our buttons well, the autogenerated function name is a pretty good choice so leave it alone. Simply click the Create button.
Now repeat this task for the New Game button, again connecting to the root Control and taking the default name. This will create two new functions in our script. Replace that script with the following code:
extends Control

func _ready():
  globals.kills = 0
  globals.currentStage = 0

func _on_QuitGameButton_pressed():
  get_tree().quit()

func _on_NewGameButton_pressed():
  get_tree().change_scene("GameScene.tscn")
This code simply exits the game if you hit the Exit Game button (duh?), and switches scenes to GameScene.tscn when we click Play Game. Of course, I suppose we should create the GameScene now, shouldn’t we?

