Now let’s add some control to our character, giving it the ability to fly up and down (and eventually shoot). First, we need to create an Input map. Go to the Project->Project Settings menu then select the Input Map tab.
Next, in the Action field, enter PLAYER_UP, then click the Add button.
Next, scroll to the bottom and locate our newly created PLAYER_UP entry, then click the + icon to the right:
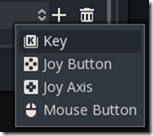
Now you can pick what Input action you want to map.
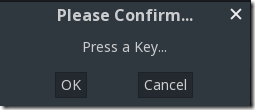
You can map multiple actions to the same action. In this case, I am simply going to map a single Key. Select Key then you will be prompted for which key to press:
In this case, I chose the UP arrow key. You could go ahead and map the controller D-Pad, the W key or however many controls as you want.
Next, create PLAYER_DOWN and map it to the down arrow, then create PLAYER_SHOOT and map it to the space bar key. Of course, you can pick whatever controls you want and map as many times as you want as well.
Now that we have our Input Map assigned, let’s write some code to handle the input. Back in our Player scene, edit Player.gd and replace with the following code:
extends Node2D


var speed = 150
var verticalMovement = 0
const MAX_VERTICAL_MOVEMENT = 200


func _process(delta):
  move_local_x(speed*delta)
  if(self.position.y > 1  && self.position.y <= get_viewport_rect().size.y):
    move_local_y(verticalMovement*delta)
  else:
    if(self.position.y < 1):
      move_local_y(10) #Bounce off top
      verticalMovement = 0
    if(self.position.y > get_viewport_rect().size.y):
      move_local_y(-10) #Bounce off bottom
      verticalMovement = 0


func _input(event):
  if(event.is_action("PLAYER_UP")):
    if(verticalMovement >= -MAX_VERTICAL_MOVEMENT):
      verticalMovement-=10
  if(event.is_action("PLAYER_DOWN")):
    if(verticalMovement <= MAX_VERTICAL_MOVEMENT):
      verticalMovement+=10
  if(event.is_action("PLAYER_SHOOT")):
    pass #We will do this later
Now if you run your game again you can now move up and down.


